In the high-stakes world of speedcubing, nothing derails a personal best faster than a cube that locks up during a crucial algorithm. The single biggest factor determining whether your cube performs like a champion or a brick is its tensioning, specifically how it handles corner cutting. As we progress through 2026, the era of blindly tightening six screws with a Phillips head screwdriver is officially over. The modern speedcube is an engineering marvel, equipped with dual-adjustment systems, MagLev technology, and ball-core mechanisms that allow for unprecedented customization.
Learning how to tension a speedcube for corner cutting is the single highest-ROI skill you can develop as a cuber. It transforms a mediocre puzzle into an extension of your fingers. This comprehensive guide will walk you through the precise mechanics of modern tensioning, how to achieve the coveted 45-degree corner cutting sweet spot, and how to maintain stability so your cube never pops during a competition solve.
Why Tension is the Secret to Flawless Corner Cutting
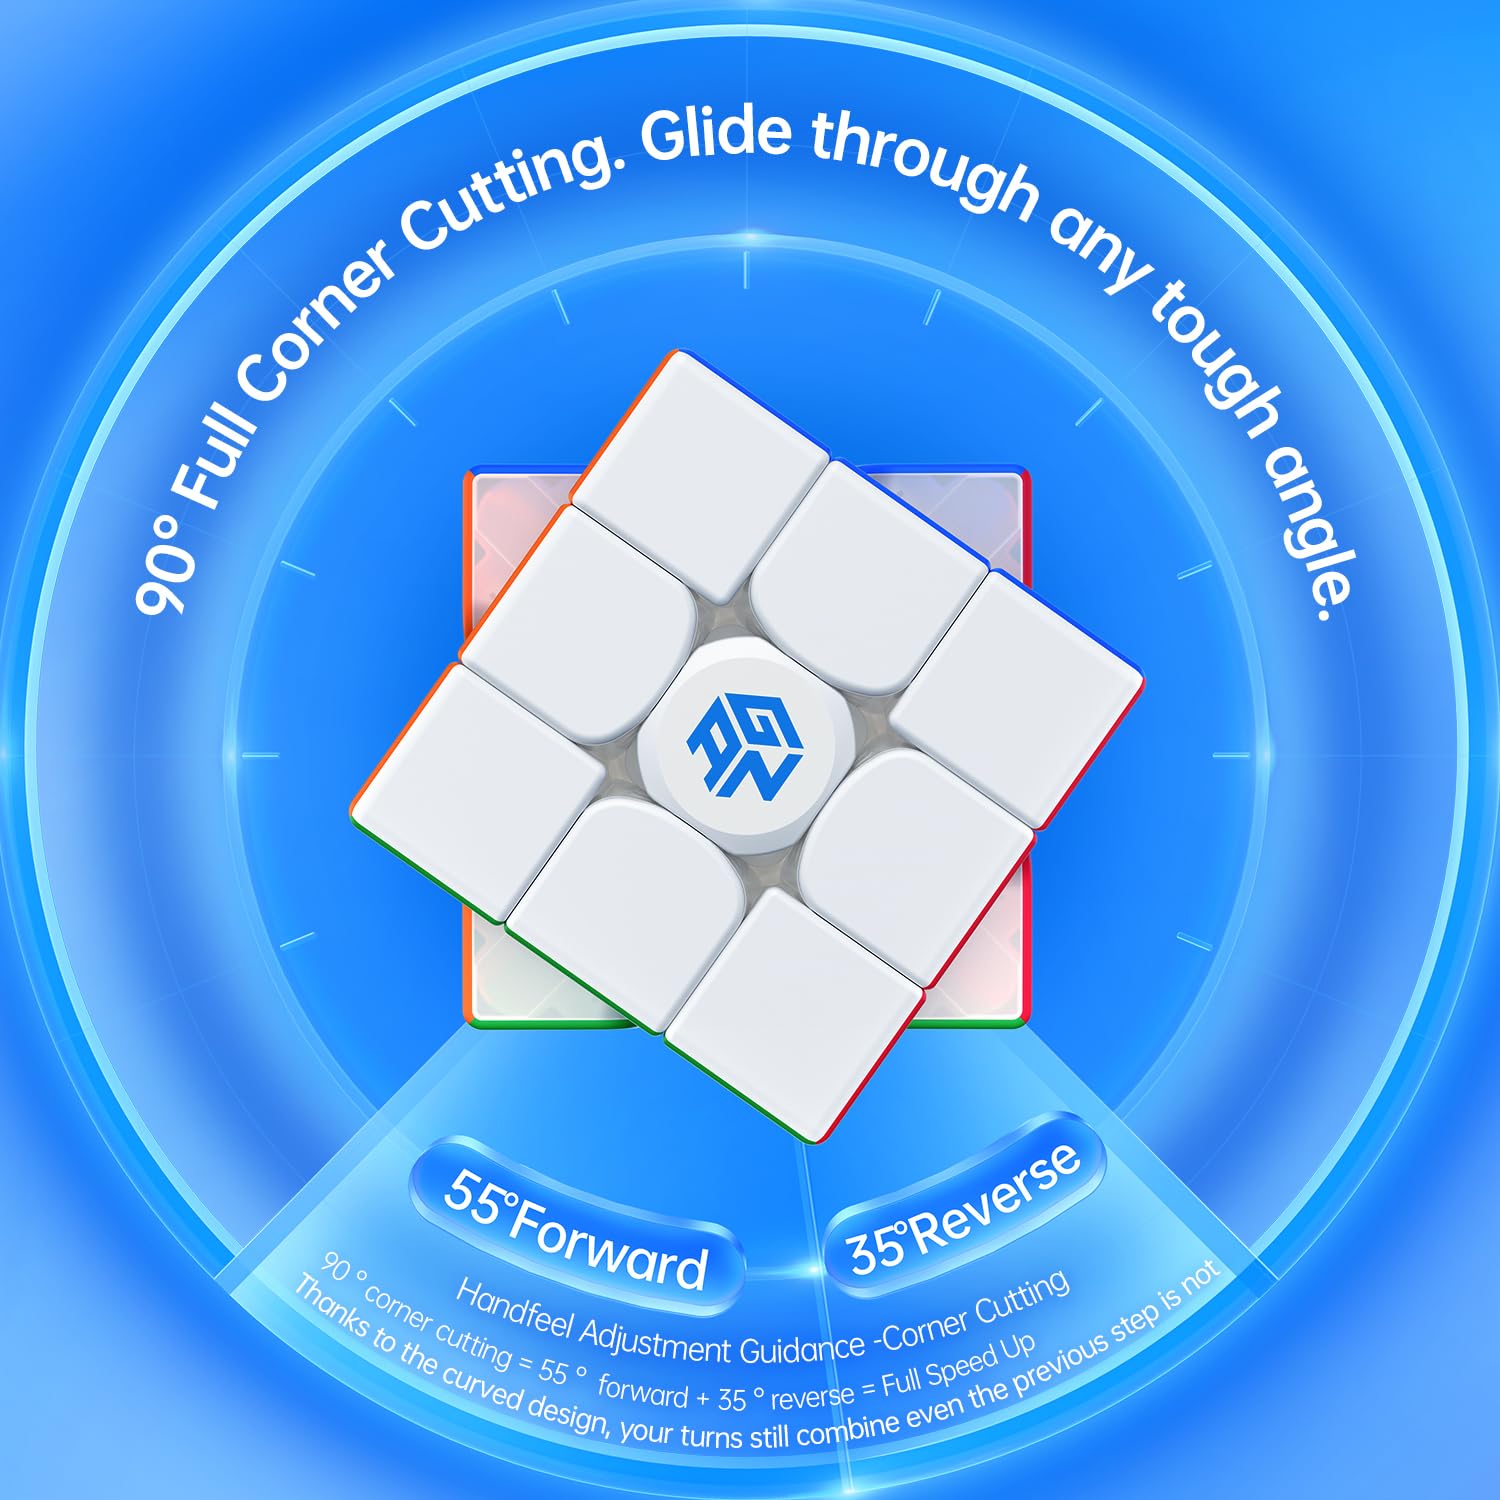
Corner cutting is the ability of a speedcube to rotate a layer even when the puzzle is slightly misaligned. In a typical solve, your layers are rarely perfectly aligned. Good corner cutting means the cube absorbs those misalignments, sliding the pieces past each other smoothly. A lack of corner cutting results in lock-ups — the dreaded feeling of the puzzle freezing mid-solve.
Tension directly controls the physical gap between the pieces. A loose tension provides the space needed for pieces to glide over each other during a cut, but it sacrifices structural stability. A tight tension locks everything down, preventing pops but severely limiting the angles at which the cube can turn. The journey of finding the perfect setup is entirely about balancing these two extremes.
What Happens When Your Cube Is Too Tight or Too Loose?
Understanding the symptoms of bad tensioning is the first step toward diagnosing your cube.
- Too Tight: The cube feels stiff and crunchy. Algorithms require significant force. There is zero room for error; any misalignment causes an immediate lock-up. The puzzle feels slow and "drags" with every turn.
- Too Loose: The cube feels airy and uncontrollable. The center pieces may lift away from the core. The corner cutting angle is massive, but the cube pops (pieces fly off) under high Turns Per Second (TPS) . The puzzle lacks the "snap" needed for precise control.
What You’ll Need Before You Start
Before diving into the adjustment process, ensure you have the right tools. A proper setup requires precision.
- Philips Head Screwdriver: Size #0 or #1 is standard. Ensure the tip fits perfectly to avoid stripping the tiny screws on your core.
- Tensioning Tool: Many 2026 flagships (like GAN cubes) include a custom wrench or tool. Use it religiously for the precision it offers.
- Feeler Gauge (Optional, Pro-Level): As noted by hardware-focused tuners, a gap gauge allows you to measure the distance between the center and edge pieces with micrometer precision (Source 6).
- High-Quality Lubricant: Tensioning changes the geometry; lube changes the friction. A silicone-based lube for the core and a water-based lube for the pieces is the gold standard.
- Patience: This is an iterative process. You will adjust, test, and adjust again.
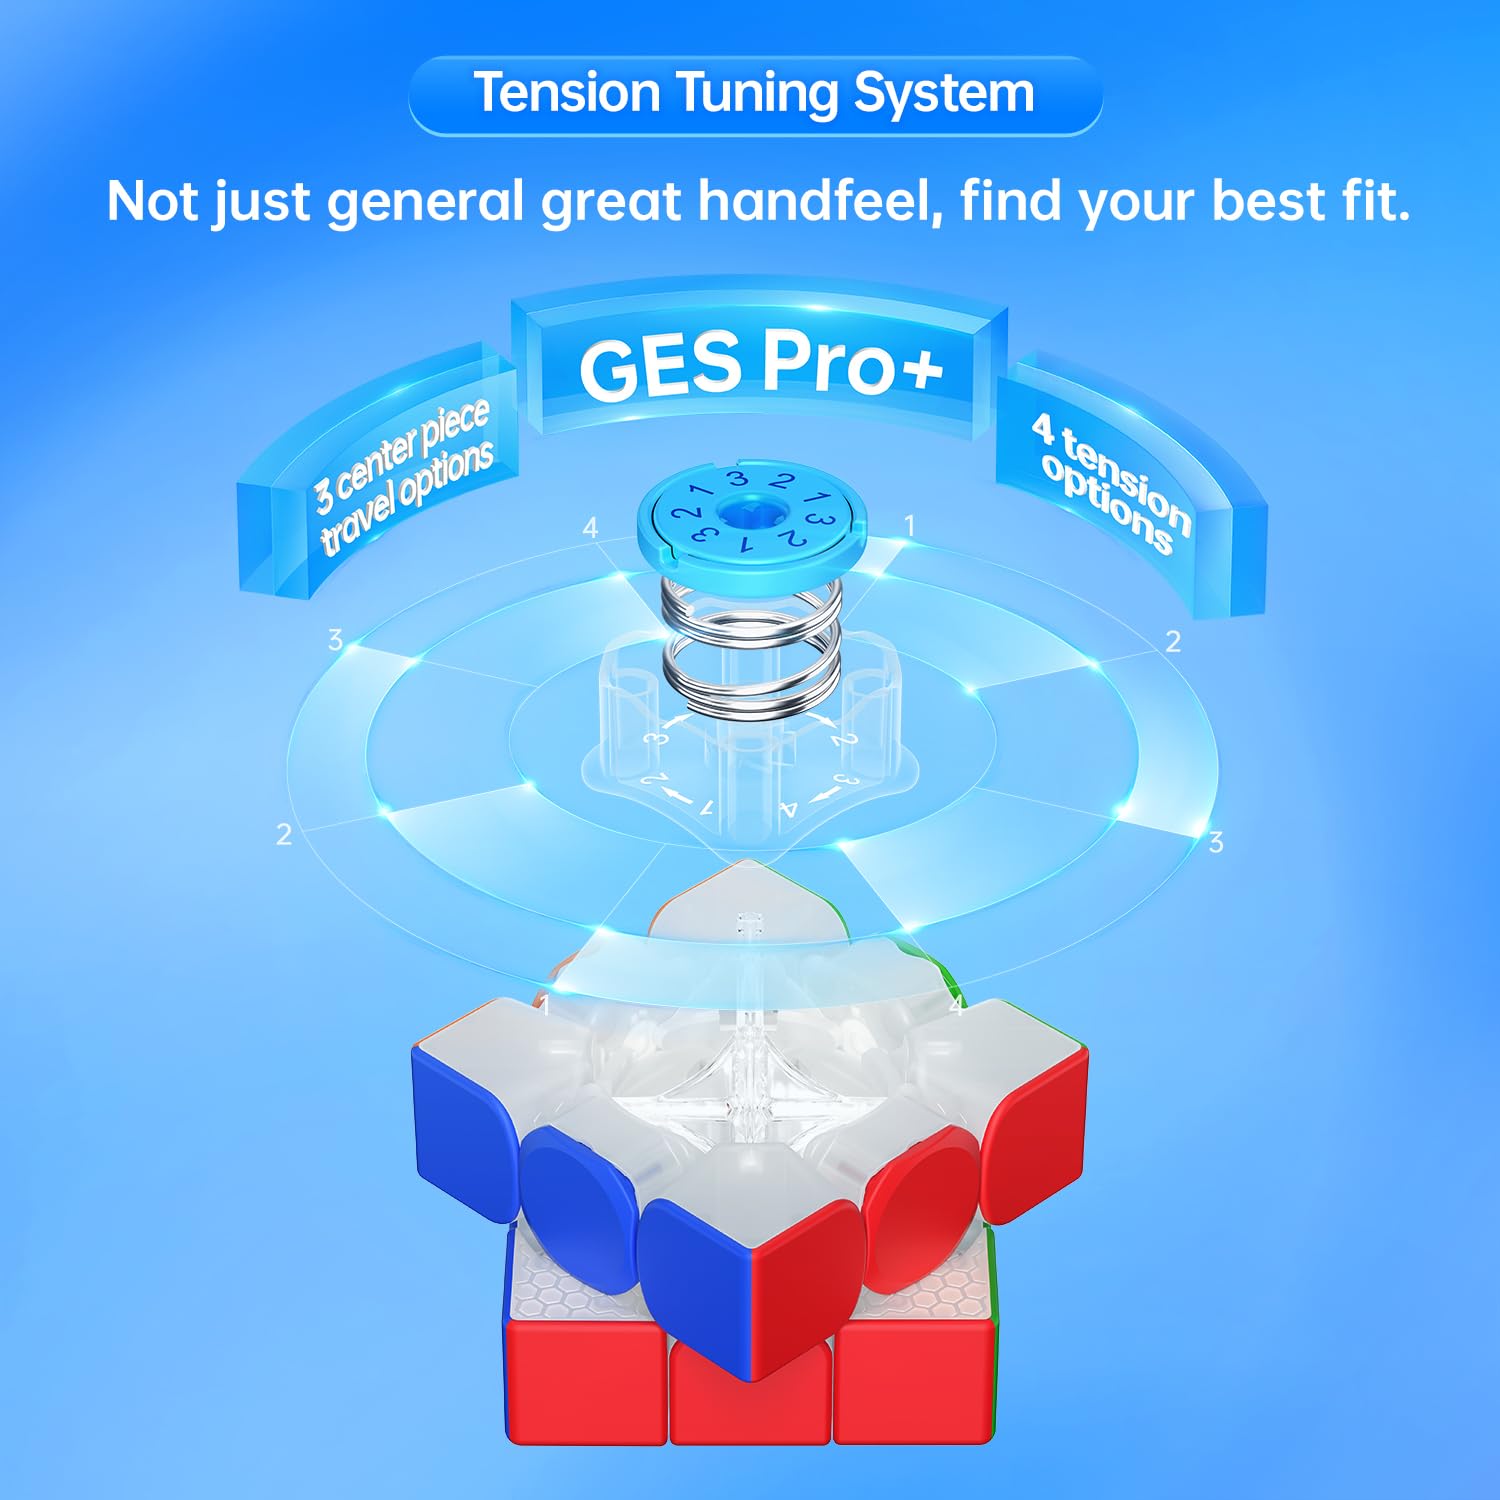
The 2026 Revolution: Dual-Adjustment Systems Explained
If your cube was made in the last few years, it likely features a dual-adjustment system. This is a game-changer for corner cutting. Instead of one single screw controlling everything, 2026 cubes split the feel into two distinct pillars (Source 1).
Axis Distance vs. Elasticity
- Axis Distance: This is the traditional "screw depth." It controls how far the center piece can travel away from the core.Loose Axis: Massively increases corner cutting ability, but makes the cube feel "floppy" and prone to popping.Tight Axis: Maximizes stability and reduces popping, but restricts the physical space needed for corner cutting, leading to lock-ups.
- Loose Axis: Massively increases corner cutting ability, but makes the cube feel "floppy" and prone to popping.
- Tight Axis: Maximizes stability and reduces popping, but restricts the physical space needed for corner cutting, leading to lock-ups.
- Elasticity: This controls the spring compression—the force pushing back against your turn.Weak Elasticity (Low Compression): The cube feels light, effortless, and "mushy." Great for speed but can cause overturning.Strong Elasticity (High Compression): The cube feels snappy and crisp. It returns to its square shape quickly, providing better control for high TPS solvers.
- Weak Elasticity (Low Compression): The cube feels light, effortless, and "mushy." Great for speed but can cause overturning.
- Strong Elasticity (High Compression): The cube feels snappy and crisp. It returns to its square shape quickly, providing better control for high TPS solvers.
The magic of 2026 tensioning is setting a loose Axis Distance (for the cut) with a strong Elasticity (for the control). This was impossible with old single-screw systems.
MagLev vs. Traditional Steel Springs
One of the biggest innovations to impact corner cutting feel is MagLev (Magnetic Levitation) . Instead of a metal spring, opposing repelling magnets create the tension.
- MagLev Benefits: Zero spring noise, zero friction from the spring stretching, and a significantly smoother feel.
- Corner Cutting Impact: MagLev allows the cube to feel incredibly fast even at tight axis settings. This makes it easier to maintain stability while retaining a high corner cutting angle. Cubes like the Cubelelo Drift 3M Plus v2 represent an excellent entry point into this technology (Source 1).
Step-by-Step: How to Tension Your Speedcube for Maximum Corner Cutting
Here is the definitive process for tuning your cube. This method works for budget cubes, intermediate puzzles, and high-end 2026 flagships. Follow the steps in order.
Step 1: Factory Reset (The Baseline)
You cannot fine-tune a cube without a consistent starting point.
- Remove all six center caps and center pieces (if detachable).
- Tighten every screw completely until you feel firm resistance. Stop immediately to avoid stripping the core.
- Now, back each screw out by exactly one full 360-degree rotation.
How to Verify Success: Your cube should feel evenly stiff across all faces. If one side feels tighter than the others, you made a counting error. Start over.
Step 2: Finding the 45-Degree Sweet Spot
This is the most reliable method for setting axis distance for corner cutting. Hold the cube. Misalign the top layer (U) relative to the right layer (R) by 45 degrees.
- The Forward Cut: Perform an R' move.If the layer drops cleanly into place with a satisfying click, the axis distance is perfect.If it catches and requires significant force, the tension is too tight. Loosen all screws by ⅛ of a turn.If the layer slides but the corner piece lifts up (threatening a pop), the tension is too loose. Tighten all screws by ⅛ of a turn.
- If the layer drops cleanly into place with a satisfying click, the axis distance is perfect.
- If it catches and requires significant force, the tension is too tight. Loosen all screws by ⅛ of a turn.
- If the layer slides but the corner piece lifts up (threatening a pop), the tension is too loose. Tighten all screws by ⅛ of a turn.
- The Reverse Cut: Immediately after the forward cut, try to push the R layer back against the misalignment.Locking up on a reverse cut is a sign of uneven edge geometry or a specific face being tighter than its opposite. A perfect cube should mirror its corner cutting ability in both directions.
- Locking up on a reverse cut is a sign of uneven edge geometry or a specific face being tighter than its opposite. A perfect cube should mirror its corner cutting ability in both directions.
⚠️ Caution: The Uneven Trap Do not adjust a single screw in isolation. If one face cuts badly, your temptation is to loosen just that one screw. This destroys the symmetry of the puzzle. If one face is tight, it means the opposite face is effectively too loose. Adjust opposite pairs to maintain a uniform gap.
Step 3: Dual-Adjustment Fine Tuning (For Modern Cubes)
Now that your Axis Distance is set for 45-degree cutting, it is time to dial in the Elasticity.
- For High TPS Solvers: Turn the elasticity nut to a higher setting (stronger spring force). This adds "snap" to the cube, ensuring it returns to zero quickly after the cut. This prevents overturning and lock-ups during fast algorithms.
- For Smooth Solvers: Turn the elasticity nut to a lower setting. This makes the turning feel effortless and light. The cube might feel a bit "floppy," but the ease of turning allows for complex fingertricks without fatigue.
The 2026 Meta: Most professional setups pair a Looser Axis Distance (for maximum cut) with a Higher Elasticity (for snappy control). This combination gives you the best of both worlds (Source 1).
Step 4: The High-TPS Algorithm Test
Tensioning in a quiet room is very different from solving under pressure. Perform a high-speed algorithm (T-perm, J-perm, or a full cross+1 solution).
How to Verify Success:
- Zero Pops: The cube must hold together under the stress of fast turning. If it pops, your Axis Distance is too loose.
- Zero Lock-ups: The cube must corner cut smoothly through every execution. If it catches, your Axis Distance is still too tight or your Elasticity is too high, preventing the pieces from settling.
- Consistent Sound: Listen for spring noise. If you hear a metallic squeak, your springs need lube, or it is time to consider a MagLev upgrade (Source 1).
Troubleshooting: Why Your Cube Still Locks Up or Pops
Even following the steps above, you might encounter specific issues. Here is how to fix the most common problems.
My Cube Pops When I Corner Cut
If the cube spits out pieces during a solve, your Axis Distance is too deep.
- The Fix: Tighten every screw by ¼ of a turn. This reduces the gap between the core and the pieces, preventing them from dislodging. You will lose a few degrees of corner cutting, but the stability will drastically improve.
My Cube Locks Up on Reverse Cuts
This is incredibly common and incredibly frustrating. The cube cuts forward perfectly but catches on the way back.
- The Fix: This is almost always a sign of uneven tensioning (Source 6). The face you are cutting toward might be perfectly loose, but the face you are cutting away from is too tight. Check the gap on the side you are pulling away from. Alternatively, this can be a sign that the Elasticity is too low — the pieces are not being forced back into alignment quickly enough.
The Center Caps Are Lifting
If the center pieces rise up away from the cube body when you corner cut, your Axis Distance is too loose and your Elasticity is too weak.
- The Fix: Increase the Elasticity setting first. If the centers still lift, tighten the Axis Distance screws by ⅛ of a turn. The centers must remain flush against the base of the cube at all times.
Frequently Asked Questions
1. What is the best tension for maximizing corner cutting while keeping the cube competition-legal? The ideal setup for a competition in 2026 is a loose Axis Distance (about 1.5 turns from tight) combined with a medium Elasticity. This allows for a solid 45-degree forward and reverse cut while maintaining the stability needed for a 5.5-second solve. It is the standard recommendation for most modern speedcubes (Source 1, Source 13).
2. Is 45 degrees of corner cutting enough for a world-class setup? Yes. While some cubes can cut past 50 degrees, the 45-degree mark is the accepted standard for a "well-tensioned cube" (Source 2). Trying to push beyond 45 degrees often sacrifices stability to the point of diminishing returns. A cube that cuts 45 degrees reliably is fine.
3. Does MagLev actually make corner cutting better, or is it marketing? It makes the feel significantly better. MagLev removes the friction of the steel spring rubbing against the core. This means your cube feels faster and smoother at the exact same corner cutting angle. It is a upgrade in friction reduction, not necessarily in maximum angle (Source 1).
4. How can I tell if my tension is even without a feeler gauge? Use the pluck test. Gently pull the edge pieces away from the center on opposite sides of the cube. The resistance should feel identical. Also, the corner cutting angle should be identical on all three axes (U/D, R/L, F/B). If cutting right is easier than cutting left, your R and L faces are uneven.
5. How often should I re-tension my speedcube? After the initial break-in period (roughly 200 solves), the springs settle significantly. You should do a full re-tension after this period. After that, check the corner cutting performance every month. If you notice a degradation in feel, it is time to check the screws (Source 3).
Final Thoughts
Learning how to tension a speedcube for corner cutting is not just about making the cube looser; it is about understanding the complex relationship between Axis Distance, Elasticity, and magnetic strength. In 2026, we have the tools to fine-tune our puzzles with surgical precision.
A perfectly tensioned cube is a joy to solve. It flows through algorithms without resistance, absorbs your turning imperfections, and never complains. By following the 45-degree sweet spot method and respecting the dual-adjustment capabilities of your cube, you can unlock performance you never knew you had.
Stop solving with a factory default puzzle. Take the screwdriver, pop the caps, and start tuning. Your next personal best is waiting for you at the perfect tension.
References
- SolvingRubiksCube — "Mastering the Modern Speedcube: How to Choose Your Perfect Tensioning System", February 2026
- Speedsolving.com Wiki — "Corner Cutting" (Terminology & Benchmark Standards), 2020
- SpeedCubes.com.au — "Tensioning and Springs 101: A Troubleshooting Guide for Speed Cubes", March 2026
- SpeedCubeShop — "Speed Cube Spring Adjustment Systems Explained", May 2025
- SpeedCube.com.au & Feliks Zemdegs — "How to Tension Your Speedcube" (Step-by-Step Video Guide), 2019
- Reddit r/Cubers — "How do you tension modern 3x3s properly?" Community Consensus, 2025
- GANCUBE — "GANCUBE’s Tension System & User Manual", 2024