Introduction to the 4x4 Rubik's Cube Experience
Stepping up from the classic 3x3 puzzle to a 4x4 Rubik's cube, often called the Rubik's Revenge, can feel like a daunting challenge. Unlike the 3x3 puzzle, a 4x4 has no fixed center pieces and introduces parity errors that require specialized algorithms to fix. Learning how to solve a 4x4 rubik's cube for beginners is an exciting milestone that expands your spatial reasoning and puzzle-solving repertoire.
This comprehensive guide breaks down the complex reduction method into bite-sized, digestible steps. By the end of this tutorial, you will understand how to conquer the extra layers, pair up matching edge pieces, and navigate parity issues like a seasoned cuber.
Essential Terminology and Anatomy of a 4x4 Cube
Before diving into the algorithms, you must understand how a 4x4 cube differs structurally from smaller twisty puzzles. Familiarizing yourself with these foundational terms will make every subsequent step much easier to follow without confusion.
- Centers: The four inner pieces on each face that do not move relative to one another on a 3x3, but float freely on a 4x4.
- Edges: The 24 edge pieces grouped in pairs that make up the outer borders of the cube faces.
- Corners: The eight corner pieces that function identically to the corners of a standard 3x3 cube.
- Parity: A state where the cube looks correct except for two pieces that are swapped or flipped, requiring special fixes.
- Reduction Method: The primary strategy of solving a 4x4 by reducing its pieces to match the behavior of a 3x3 cube.
- Inner Slices: The layers located directly next to the outer face turns, denoted by lowercase letters in notation.
- Fixed Reference: Using the static color arrangement of the center pieces to guide your entire solve.
Understanding 4x4 Cube Notation and Move Sets
Cube notation is the universal language of twisting puzzles, allowing you to read algorithms accurately. On a 4x4, notation expands to include wide turns and inner slice turns alongside standard outer face turns.
- Capital letters like R, L, U, D, F, and B mean turn that specific outer face 90 degrees clockwise.
- Adding an apostrophe (like R') means turn that face 90 degrees counter-clockwise.
- Adding a number two (like R2) means turn that face 180 degrees in either direction.
- Lowercase letters or the letter 'w' (wide) indicate turning two layers simultaneously, such as Rw or r.
- Inner slice turns involve moving only the internal layers, such as moving the middle vertical layer without the outer right or left faces.
- Memorizing these directional cues prevents costly mistakes during long algorithms.
- Always hold the cube with a consistent front face and top face while executing notation sequences.
Step 1: Building the First Two Centers
The first major phase of the reduction method is solving the center pieces. Because 4x4 cubes lack fixed center pieces, you must rely on the permanent color scheme of your cube corners to determine where each center belongs. Traditionally, you start by building the white center on the bottom face.
Techniques for Center Construction
Building centers requires intuition rather than rigid algorithms. You group same-colored pieces together on the inner slices and maneuver them into position without destroying previously solved centers.
- Always start with the white center, followed immediately by the opposite yellow center.
- Keep standard color orientation in mind: usually Red opposite Orange, and Blue opposite Green.
- Use temporary bars by pairing two center pieces together before inserting them into the target face.
- Protect your completed centers by moving them out of the way when turning active slices.
- Practice looking ahead to spot floating center pieces scattered across different faces.
- Avoid rushing this phase, as accurate centers form the foundation for all subsequent steps.
Step 2: Completing the Remaining Four Centers
Once you finish the white and yellow centers, you must solve the four equatorial centers surrounding the middle layer. Maintaining the correct color order is critical here, or your final cube will have impossible color configurations.
- Place your completed white center on the bottom and yellow center on the top.
- Look at the side faces and select one color to build next, such as blue.
- Bring scattered blue center pieces into the front-right slice using safe quarter turns.
- Form a 1x2 bar of blue center pieces and insert it into the target position.
- Repeat the bar-building technique for the red, green, and orange centers in clockwise order.
- Double-check that your color scheme follows the standard Western color scheme layout.
- If a center gets scrambled, gently reconstruct it using basic slice movements.
Step 3: Edge Pairing Strategies for Beginners
With all six centers firmly established, your 4x4 cube now resembles a giant 3x3 puzzle in terms of centers, but its 24 edge pieces are still split into pairs. Edge pairing is the process of matching identical edge halves together to form 12 unified edge units.
Basic Edge Pairing Method
The standard beginner approach involves bringing two matching edge pieces into the same horizontal slice, aligning them, and swapping them out for an unsolved edge pair.
- Bring an unsolved edge piece into the front-right position on the upper half of the slice.
- Find its matching partner and position it in the front-right lower half so their colors match or invert correctly.
- Execute a slice move to unite the pair into a solid edge block.
- Rotate the top face to store the newly completed edge pair safely out of the way.
- Restore the center pieces immediately by reversing your initial slice turn.
- Repeat this pairing process until you have 10 out of the 12 total edges completed.
Step 4: The Last Two Edges Special Technique
The final two edge pairs cannot be solved using the standard method without breaking your previously paired edges. This requires a specific alignment technique to pair them simultaneously.
- Bring the two remaining unassigned edge pairs into the front-right and front-left positions.
- Align the matching colors so that when you slice and rotate, they pair up cleanly.
- Execute the standard last-two-edges algorithm: Rw U2 x' Rw U2 Rw U2 Rw' U2 Lw U2 3Rw' U2 Rw U2 Rw' U2 Rw'.
- Observe how the two fragmented edges snap into complete single-piece units.
- Restore any displaced center pieces back to their proper solved states.
- Inspect your cube to confirm that all 12 edge pairs are fully assembled.
Step 5: Reducing to a 3x3 Equivalent
At this stage, your 4x4 cube is fully reduced. The six multi-piece centers act as single center blocks, and the 24 fragmented edges act as 12 unified edge units. You can now solve the rest of the puzzle exactly like a traditional 3x3 cube.
Reduction is the bridge between complex multi-piece manipulation and familiar 3x3 intuition. Once your edges and centers are locked, treat every 2x1 block as a standard 3x3 piece.
Begin by solving the white cross on the bottom face, followed by inserting the first two layer (F2L) corner-edge pairs. Because you practiced these techniques on smaller puzzles, this phase should feel comfortable and straightforward. For a refresher on these foundational techniques, review our guide on how to solve a 3x3 rubik's cube step by step to reinforce your muscle memory.
Step 6: Recognizing and Fixing OLL Parity
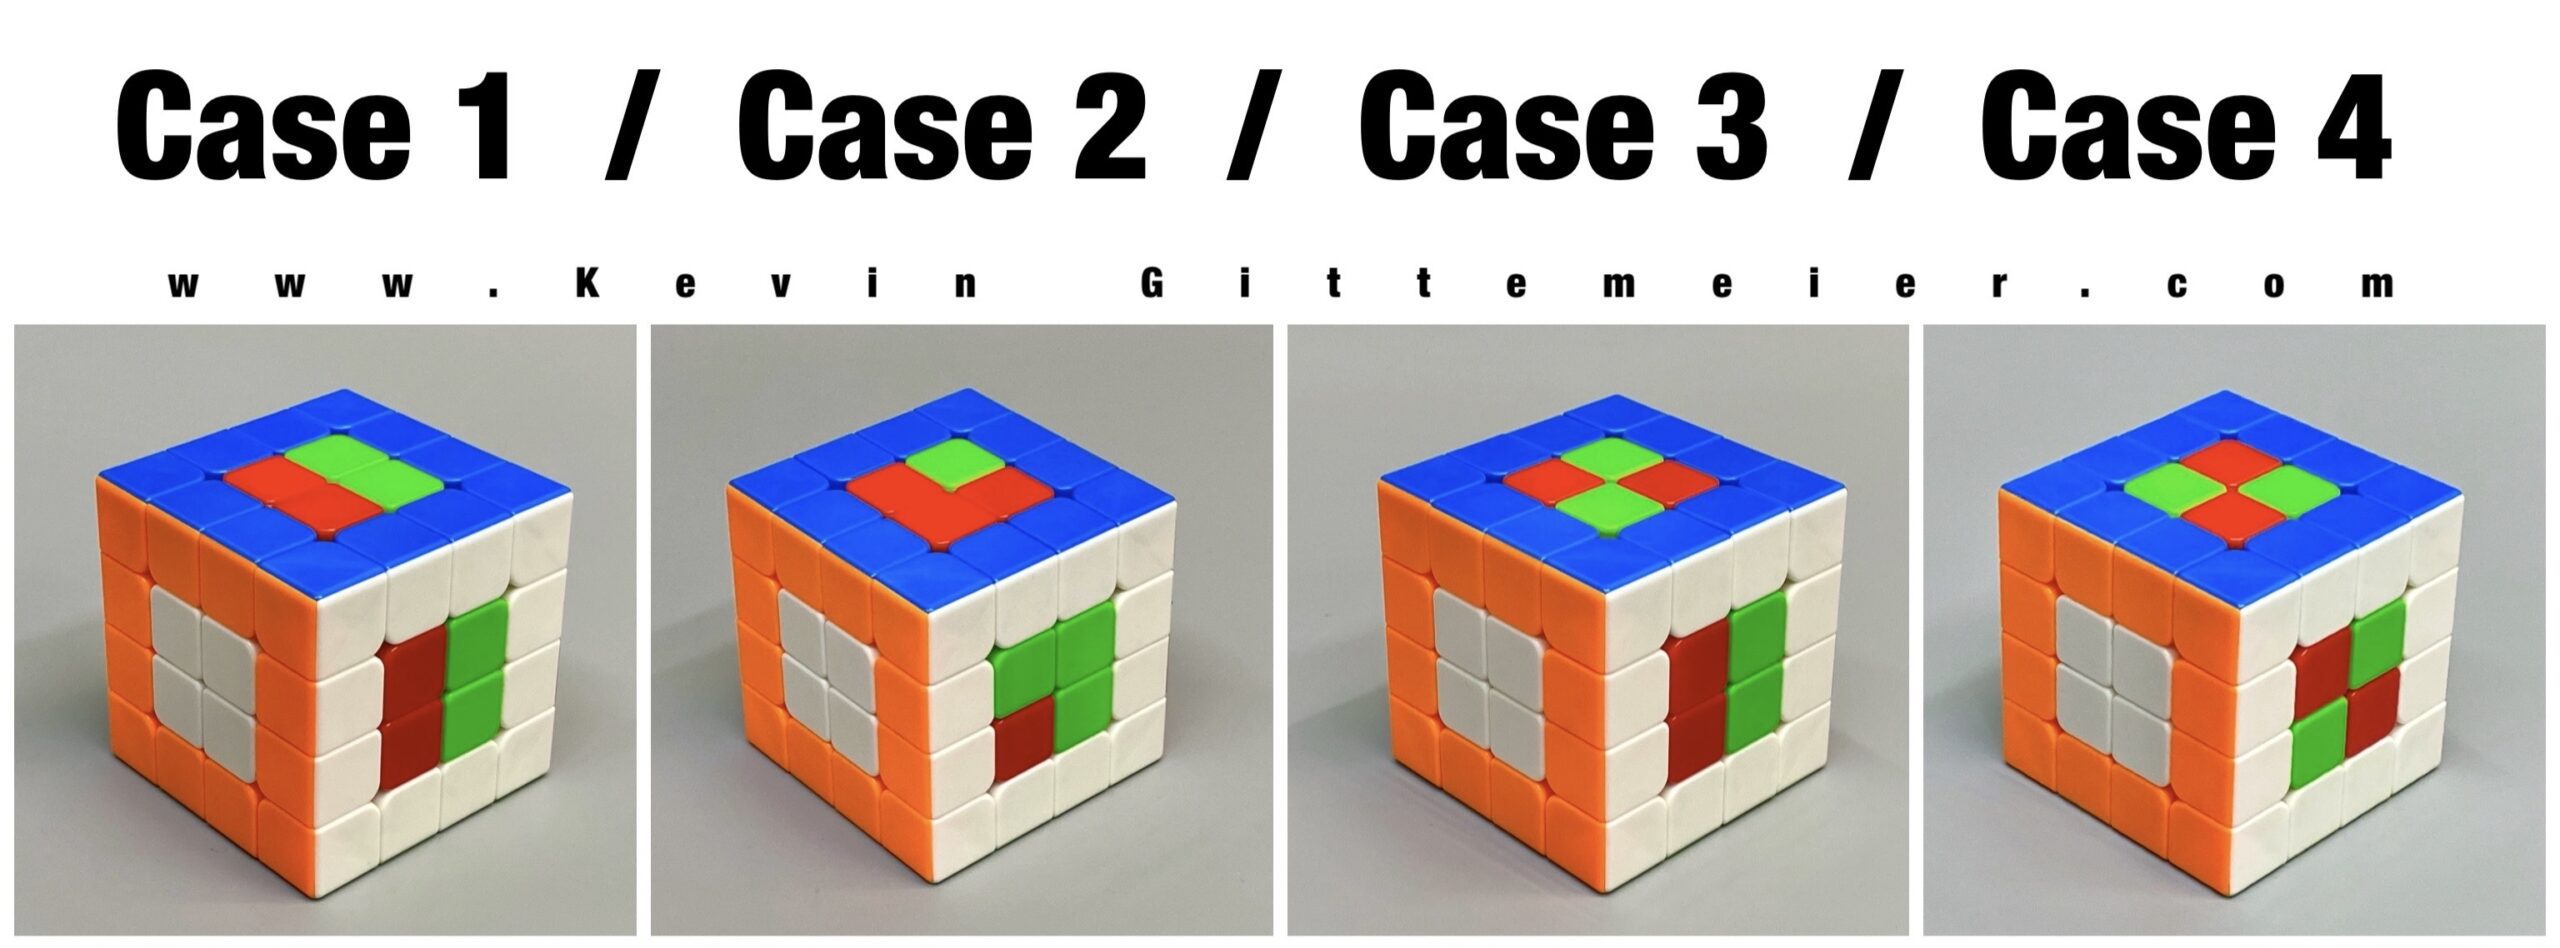
When you reach the final layer of your 4x4 solve, you may encounter a situation that is completely impossible on a standard 3x3 cube—such as a single edge flipped upside down with all other yellow pieces facing upward. This is known as OLL (Orientation Last Layer) parity.
OLL Parity Algorithm and Execution
To fix OLL parity, hold your cube so the flipped edge is facing you horizontally, and execute the following wide-turn algorithm.
- Algorithm: Rw U2 x Rw U2 Rw U2 Rw' U2 Lw U2 3Rw' U2 Rw U2 Rw' U2 Rw' (or the shorter standard OLL parity sequence: r2 B2 U2 l U2 r' U2 r U2 F2 r F2 l' B2 r2).
- Execute the inner slice turns smoothly and carefully to avoid dropping pieces.
- Check that the edge successfully flips into the correct orientation.
- Proceed with standard 3x3 OLL algorithms to complete the top yellow face.
- Verify that no other edge pieces were accidentally displaced during the turn sequence.
- Practice this algorithm several times in isolation until you can perform it without looking at a reference sheet.
Step 7: Recognizing and Fixing PLL Parity
Even after fixing your top face, you might run into a second type of parity during the Permutation Last Layer (PLL) phase. PLL parity occurs when two opposite corner pieces or two edge pieces need to swap places, an event that never happens on an even-layered 3x3 puzzle.
- Identify the specific PLL parity: usually a situation where two corner blocks need to swap across the diagonal. Common indicators include two solved adjacent corners with two mismatched corners diagonally opposite.
- Hold the cube so the swap target is facing directly toward you.
- Execute the PLL parity algorithm: 2R2 U2 2R2 u2 2R2 2u2 (where 2R represents turning the two rightmost layers simultaneously).
- Watch as the internal layers realign the mismatched pieces into their correct topological positions.
- Finish solving the final layer using standard 3x3 Permutation algorithms such a T-perm or Y-perm.
- Celebrate as your 4x4 Rubik's cube is officially fully solved!
Comparison of Rubik's Cube Sizes for Beginners
Choosing the right twisty puzzle depends on your current experience level. Here is a quick breakdown comparing the 2x2, 3x3, and 4x4 cubes to help you understand their unique mechanical differences.
| Cube Type | Complexity Level | Unique Feature | Primary Challenge |
|---|---|---|---|
| 2x2 Cube | Beginner | No center pieces | Blind corner visualization |
| 3x3 Cube | Intermediate | Fixed center pieces | F2L and last layer algorithms |
| 4x4 Cube | Advanced Beginner | Floating centers & parity | Edge pairing & parity errors |
Common Mistakes Made by Beginner Cuber Learners
Learning how to solve a 4x4 cube comes with a learning curve. Avoiding these frequent beginner pitfalls will save you hours of frustration and unnecessary re-solves.
- Neglecting the correct center color order, resulting in impossible corner placements during the final stages.
- Confusing outer face turns with inner slice turns, which accidentally destroys completed center blocks.
- Panicking when encountering OLL or PLL parity instead of recognizing them as normal mechanical occurrences.
- Failing to store paired edges safely before rotating the top face during the edge pairing phase.
- Rushing through the reduction phase without double-checking the alignment of the final two edges.
- Using poor finger tricks that cause the puzzle to catch and pop internal pieces out of alignment.
Tips for Speeding Up Your 4x4 Solves
Once you successfully solve your 4x4 cube for the first time using a slow, methodical approach, you will naturally want to improve your execution speed and reduce your overall solve time.
- Practice fluid finger tricks for wide moves to minimize hand repositioning.
- Look ahead during edge pairing to locate your next target pair before finishing the current one.
- Streamline your center-building technique by grouping three-piece bars instead of single tiles.
- Keep your cube well-lubricated with silicone-based puzzle lube to ensure smooth inner slice rotations.
- Memorize your parity algorithms so you can execute them fluidly without hesitation.
- Explore our guide on how to solve a rubik's cube faster for advanced speedcubing efficiency tips.