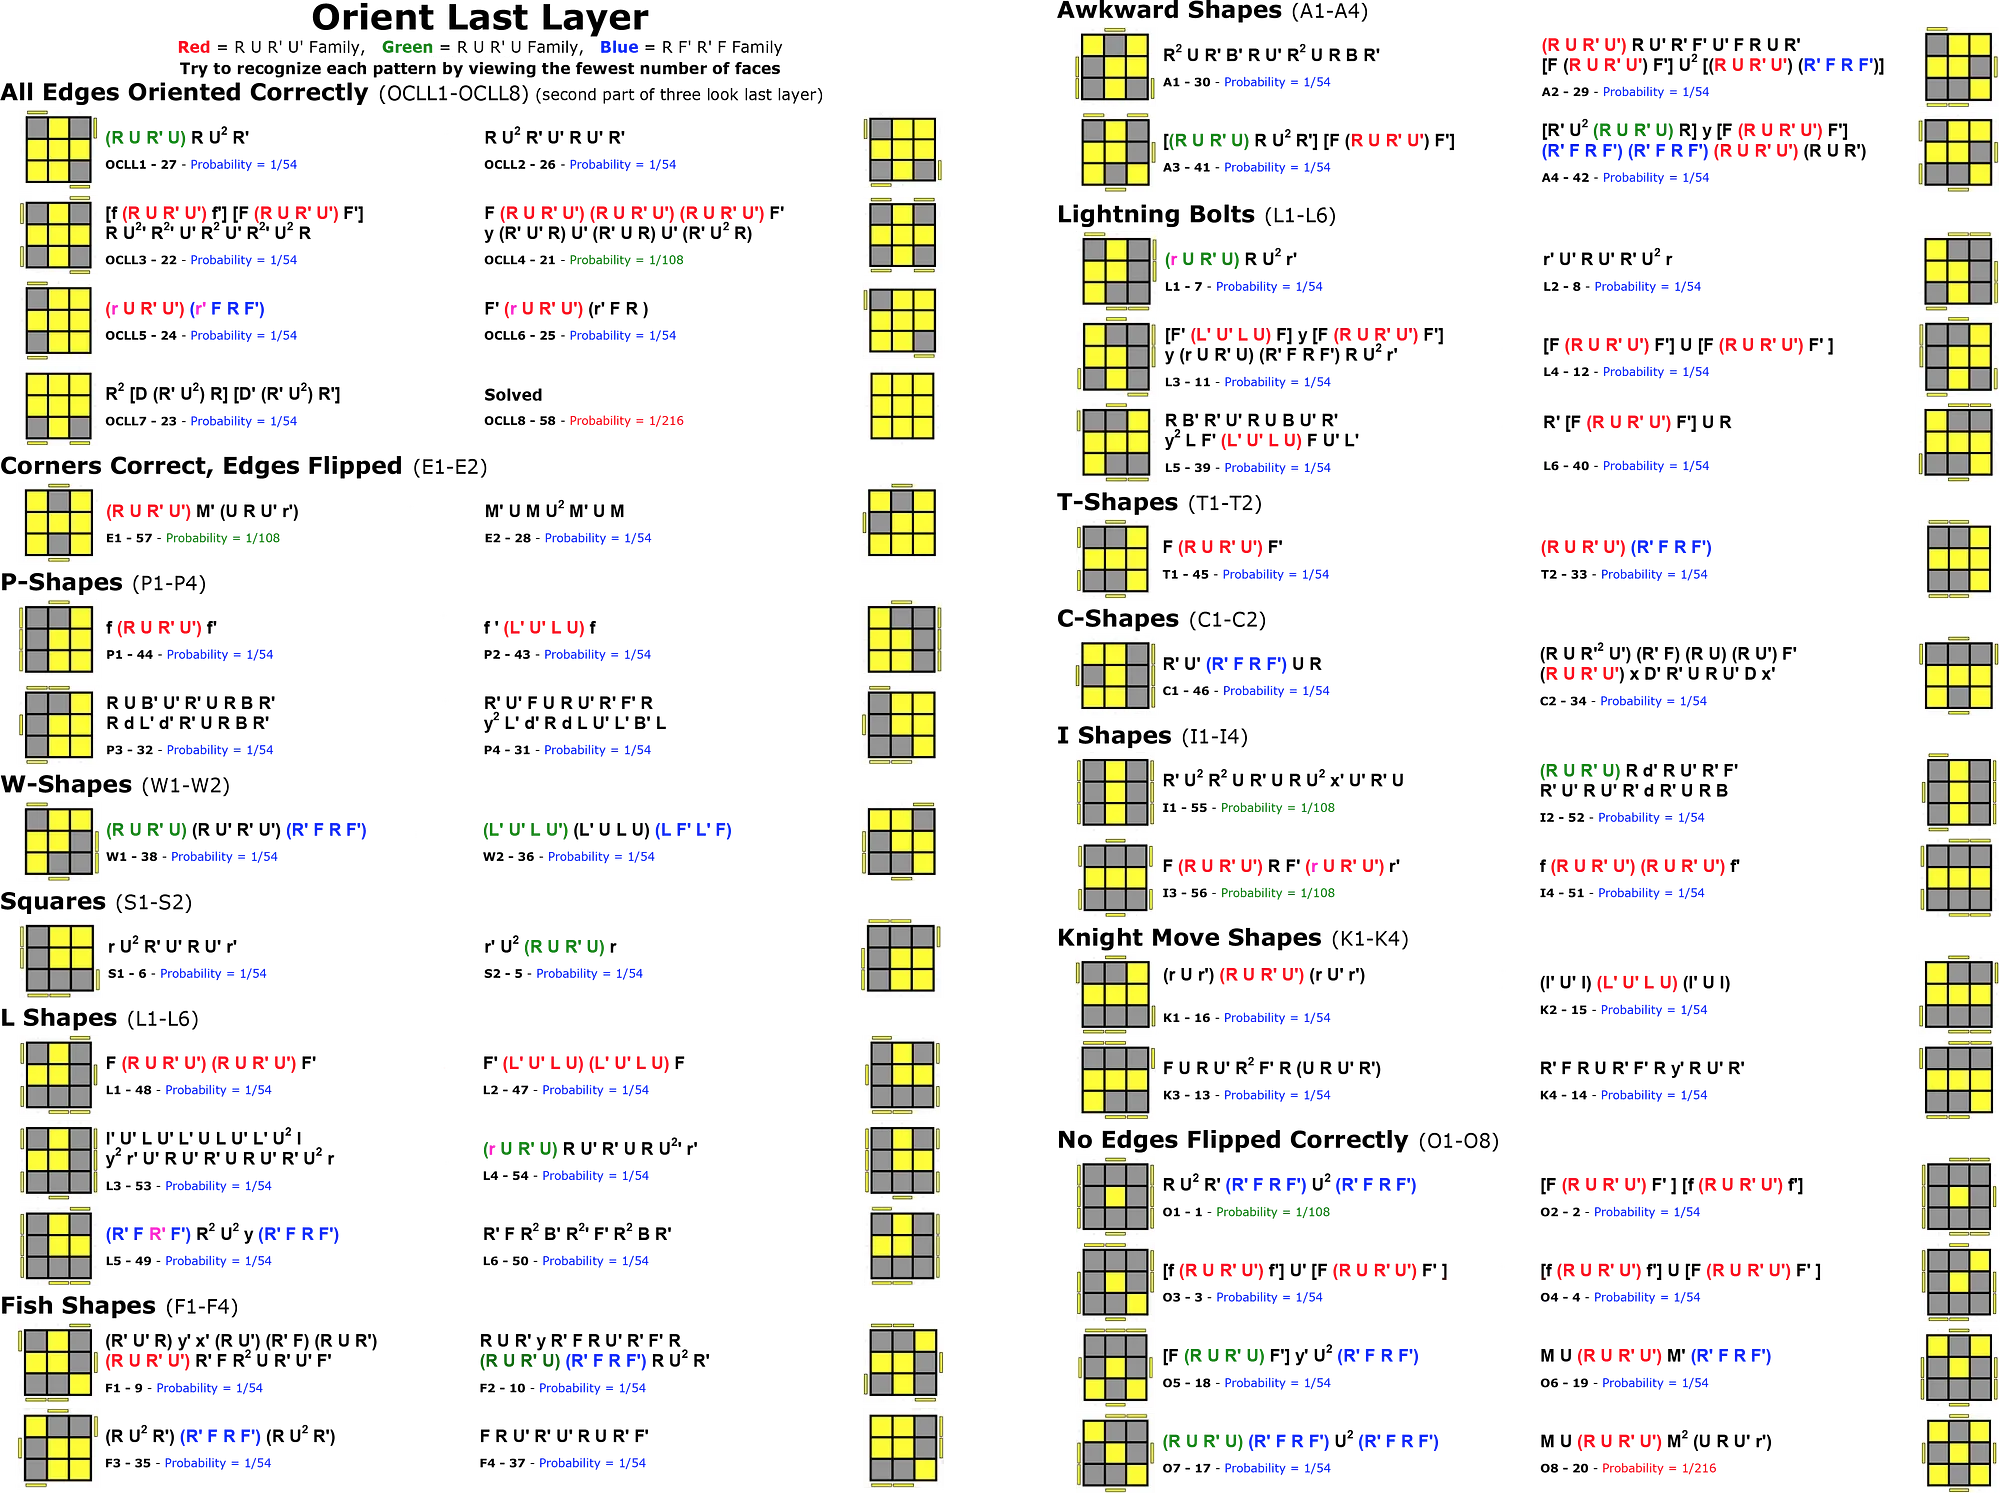
Understanding the Anatomy of the Rubik's Cube Last Layer
Solving the final stage of a puzzle can feel intimidating when you look at all those mixed-up pieces waiting for your command. The top layer of your puzzle consists of nine distinct visible stickers on the face, but structurally it contains edge pieces and corner pieces that must align with both the top face and the surrounding side colors. When you reach this stage after completing the first two layers, you have successfully built a solid foundation and only need to apply specific sequences to finish the challenge without destroying your previous progress.
Before diving into complex finger tricks, you should familiarize yourself with the spatial orientation of the top face. The center piece never moves and dictates the color of that entire side, which anchors your reference point during every sequence. The four edge pieces share two colors each, connecting the top face to the front, back, left, or right faces. Meanwhile, the four corner pieces anchor three colors, bridging the top face with two adjacent side faces. Knowing these distinctions prevents you from mixing up edges and corners when reading notation guides.
- Center pieces remain fixed in place and determine the target color of the entire side.
- Edge pieces require precise rotation and positioning to match both top and side colors.
- Corner pieces anchor three distinct color faces and demand careful orientation sequences.
- Top layer orientation relies heavily on maintaining the bottom two layers intact.
- Visualization of the final state helps reduce execution errors during fast turns.
Decoding Cube Notation Before You Start Turning
To follow any guide on rubik's cube last layer algorithms for beginners, you must first understand the universal letter notation system created by David Singmaster. Each letter represents a 90-degree clockwise turn of a specific face when you look directly at that face. Prime symbols indicated by an apostrophe mean a counter-clockwise turn, while the number two indicates a double turn of 180 degrees. Learning this shorthand saves you from reading lengthy paragraph instructions and allows you to execute turns with speed and precision.
Practicing these fundamental turns slowly will build essential muscle memory in your wrists and fingers. Never force a jammed piece, as modern speed cubes rely on loose, well-lubricated internal mechanisms that turn smoothly with gentle pressure. If a turn feels awkward, pause and adjust your grip so your thumb and fingers support the core stability while your outer fingers flick the layers.
- Hold the puzzle firmly with your index fingers resting on the top front edges.
- Identify the target face letter, such as R for the right side or U for the top upper layer.
- Execute a standard clockwise quarter turn for the specified uppercase letter.
- Perform counter-clockwise turns when you see a prime symbol attached to the letter.
- Practice double turns smoothly by pushing the face twice with your index finger.
Phase One: Creating a Cross on the Top Face
The very first objective in finishing your puzzle is forming a cross of the top color without worrying about whether the side colors match yet. Depending on how your previous layers resolved, you will encounter one of four distinct patterns on your top face. These range from a single dot in the center to an L-shaped line, a horizontal bar, or a completed cross. Recognizing your specific pattern lets you apply the correct setup formula immediately.
Once you identify your pattern, hold the puzzle so that specific shapes point toward the correct clock positions before executing the trigger sequence. For the L-shape, position the pieces pointing toward the back and left faces. For the horizontal bar, align the bar horizontally across your field of vision. Executing the standard front-right-up sequence transforms these initial shapes into your desired cross.
Consistency in holding the puzzle correctly before executing any algorithm is the single most important habit for avoiding frustrating mistakes.
- Inspect the top face to categorize your current state into a dot, L-shape, bar, or cross.
- Position the puzzle according to your identified pattern guidelines.
- Execute the classic front-right sequence: F R U R' U' F'.
- Check the top face again to ensure a solid cross has successfully formed.
- Repeat the sequence if you started from a single center dot.
Phase Two: Permuting Top Edges to Match Side Centers
Now that you have a solid cross on your top face, the next hurdle involves aligning the side colors of those edge pieces with the fixed center pieces on the lateral faces. Often, only two adjacent edges match up correctly while the other two remain swapped. Finding the correct positioning for these pieces ensures that your side walls look uniform and sets up the final corner adjustments.
To fix misaligned edges, hold the puzzle so that the two solved edges sit at the back and right positions relative to your view. When no two adjacent edges match, simply perform the positioning sequence from any angle, then rotate the top layer until two edges line up properly. This approach simplifies the process and keeps your algorithms short and memorable.
- Inspect all four side faces to see which edge pieces currently align with their center colors.
- Rotate the top layer to find a position where at least two adjacent edges match correctly.
- Hold the matched edges at the back and right sides of your viewing angle.
- Execute the standard edge swap algorithm: R U R' U R U2 R'.
- Rotate the top layer once more to verify that all four side edges match their centers.
Phase Three: Positioning the Corner Pieces Correctly
With your edges squared away, your attention shifts to the four corner pieces of the top layer. At this stage, you want to check if any corner piece sits in its correct spatial location, even if its individual sticker orientation is twisted. A correct corner piece shares the exact three colors of the adjacent side centers and top face, regardless of whether the top color points upward.
If you find one correctly positioned corner, hold that corner in the front-right-top position so it acts as your anchor. If no corners are in the right spot, execute the corner positioning sequence from any angle to lock at least one piece into place. This systematic method guarantees that you can find and secure your remaining corners without getting lost in endless random twists.
- Scan all four top corners to see which piece sits between the correct side centers.
- Keep your sole correctly positioned corner in the front-right spot facing you.
- Run the corner cycle algorithm: U R U' L' U R' U' L.
- Inspect the corners again to confirm all four reside in their proper spatial locations.
- Repeat the cycle if any corner drifted out of place during the first attempt.
Phase Four: Orienting Final Corners to Finish the Puzzle
The final hurdle in mastering rubik's cube last layer algorithms for beginners is twisting those last remaining corners so the primary top color faces upward. This step often causes panic because it looks like you are actively scrambling your solved work. Trust the process and remember that completing this specific sequence on every misplaced corner will restore the entire puzzle to a solved state.
Keep your puzzle oriented with the solved layers firmly at the bottom and your target unsolved corner in the bottom-right position of the front face. Perform the simple right-hand trigger repeatedly until that single corner points upward. Rotate only the bottom layer to bring the next unsolved corner into position, and repeat until absolute completion.
- Keep the fully solved bottom and middle layers facing downward throughout this final step.
- Bring your target unsolved corner to the bottom-right position on your front face.
- Execute the beginner-friendly right trigger repeatedly: R' D' R D.
- Watch closely as the corner twists upward while preserving your lower layers.
- Rotate the bottom layer only to address the next unsolved corner piece.
Common Beginner Mistakes and How to Avoid Them
Many aspiring cubers struggle because they rush through the final steps without double-checking their cube orientation. If you tilt the puzzle halfway through an algorithm, your left and right turns will reverse, resulting in a scrambled mess that requires you to start over from scratch. Always maintain a firm, consistent grip and finish every single move in a sequence before pausing.
Another frequent error involves confusing the mirror-image algorithms for edges and corners. When learning new sequences, write them down on a small index card and keep it nearby for quick reference. For additional insights on foundational solving techniques, check out this comprehensive rubik's cube algorithms guide to reinforce your practice routine.
- Avoid tilting or rotating the puzzle body midway through an active algorithm sequence.
- Double-check your prime turns to ensure you never turn a face the wrong way.
- Practice each sub-step slowly before attempting to build speed or timing yourself.
- Use trusted written guides rather than relying purely on memory during early practice sessions.
- Keep your cube clean and tensioned properly to prevent frustrating lock-ups and corner twists.
Essential Comparison of Last Layer Techniques
As you progress from absolute beginner to intermediate cubing, you will encounter different method subsets designed to speed up your solves. Choosing the right approach depends entirely on your personal goals, whether you want a casual hobby or a competitive speedcubing career. The table below outlines the primary last layer strategies available to learners today.
| Method Name | Difficulty | Average Moves | Best Suited For |
|---|---|---|---|
| Beginners Method | Easy | 15 - 25 moves | Absolute novices learning spatial logic |
| 2-Look OLL / PLL | Moderate | 10 - 15 moves | Intermediate solvers wanting faster times |
| Full CFOP (1-Look) | Advanced | 5 - 10 moves | Competitive speedcubers seeking records |
| Roux Last Steps | Advanced | 8 - 12 moves | Solvers who prefer block-building styles |
Pro Tips for Faster Execution and Muscle Memory
Developing smooth finger tricks requires patience and intentional repetition rather than brute-force speed. Start by practicing your algorithms without looking at the pieces, letting your muscle memory guide your fingers naturally. For extra help building your foundational skills from the very beginning, review this detailed how to solve a rubik's cube tutorial to refine your cross and F2L transitions.
Keep your practice sessions short and frequent rather than marathoning for hours when your hands get tired. Fatigue leads to sloppy turns, dropped cubes, and misplaced finger placements that break your concentration. Track your progress with a simple notebook to celebrate milestone achievements like dropping your solve time below two minutes.
- Practice your algorithms ten times in a row without stopping to build automatic muscle memory.
- Keep your fingernails trimmed short to prevent them from catching on internal cube edges.
- Use a reliable lubricant designed specifically for puzzle plastics to maintain buttery smooth turns.
- Warm up your wrists with gentle stretches before attempting timed speed solves.
- Analyze your mistakes objectively whenever a solve goes wrong instead of getting frustrated.