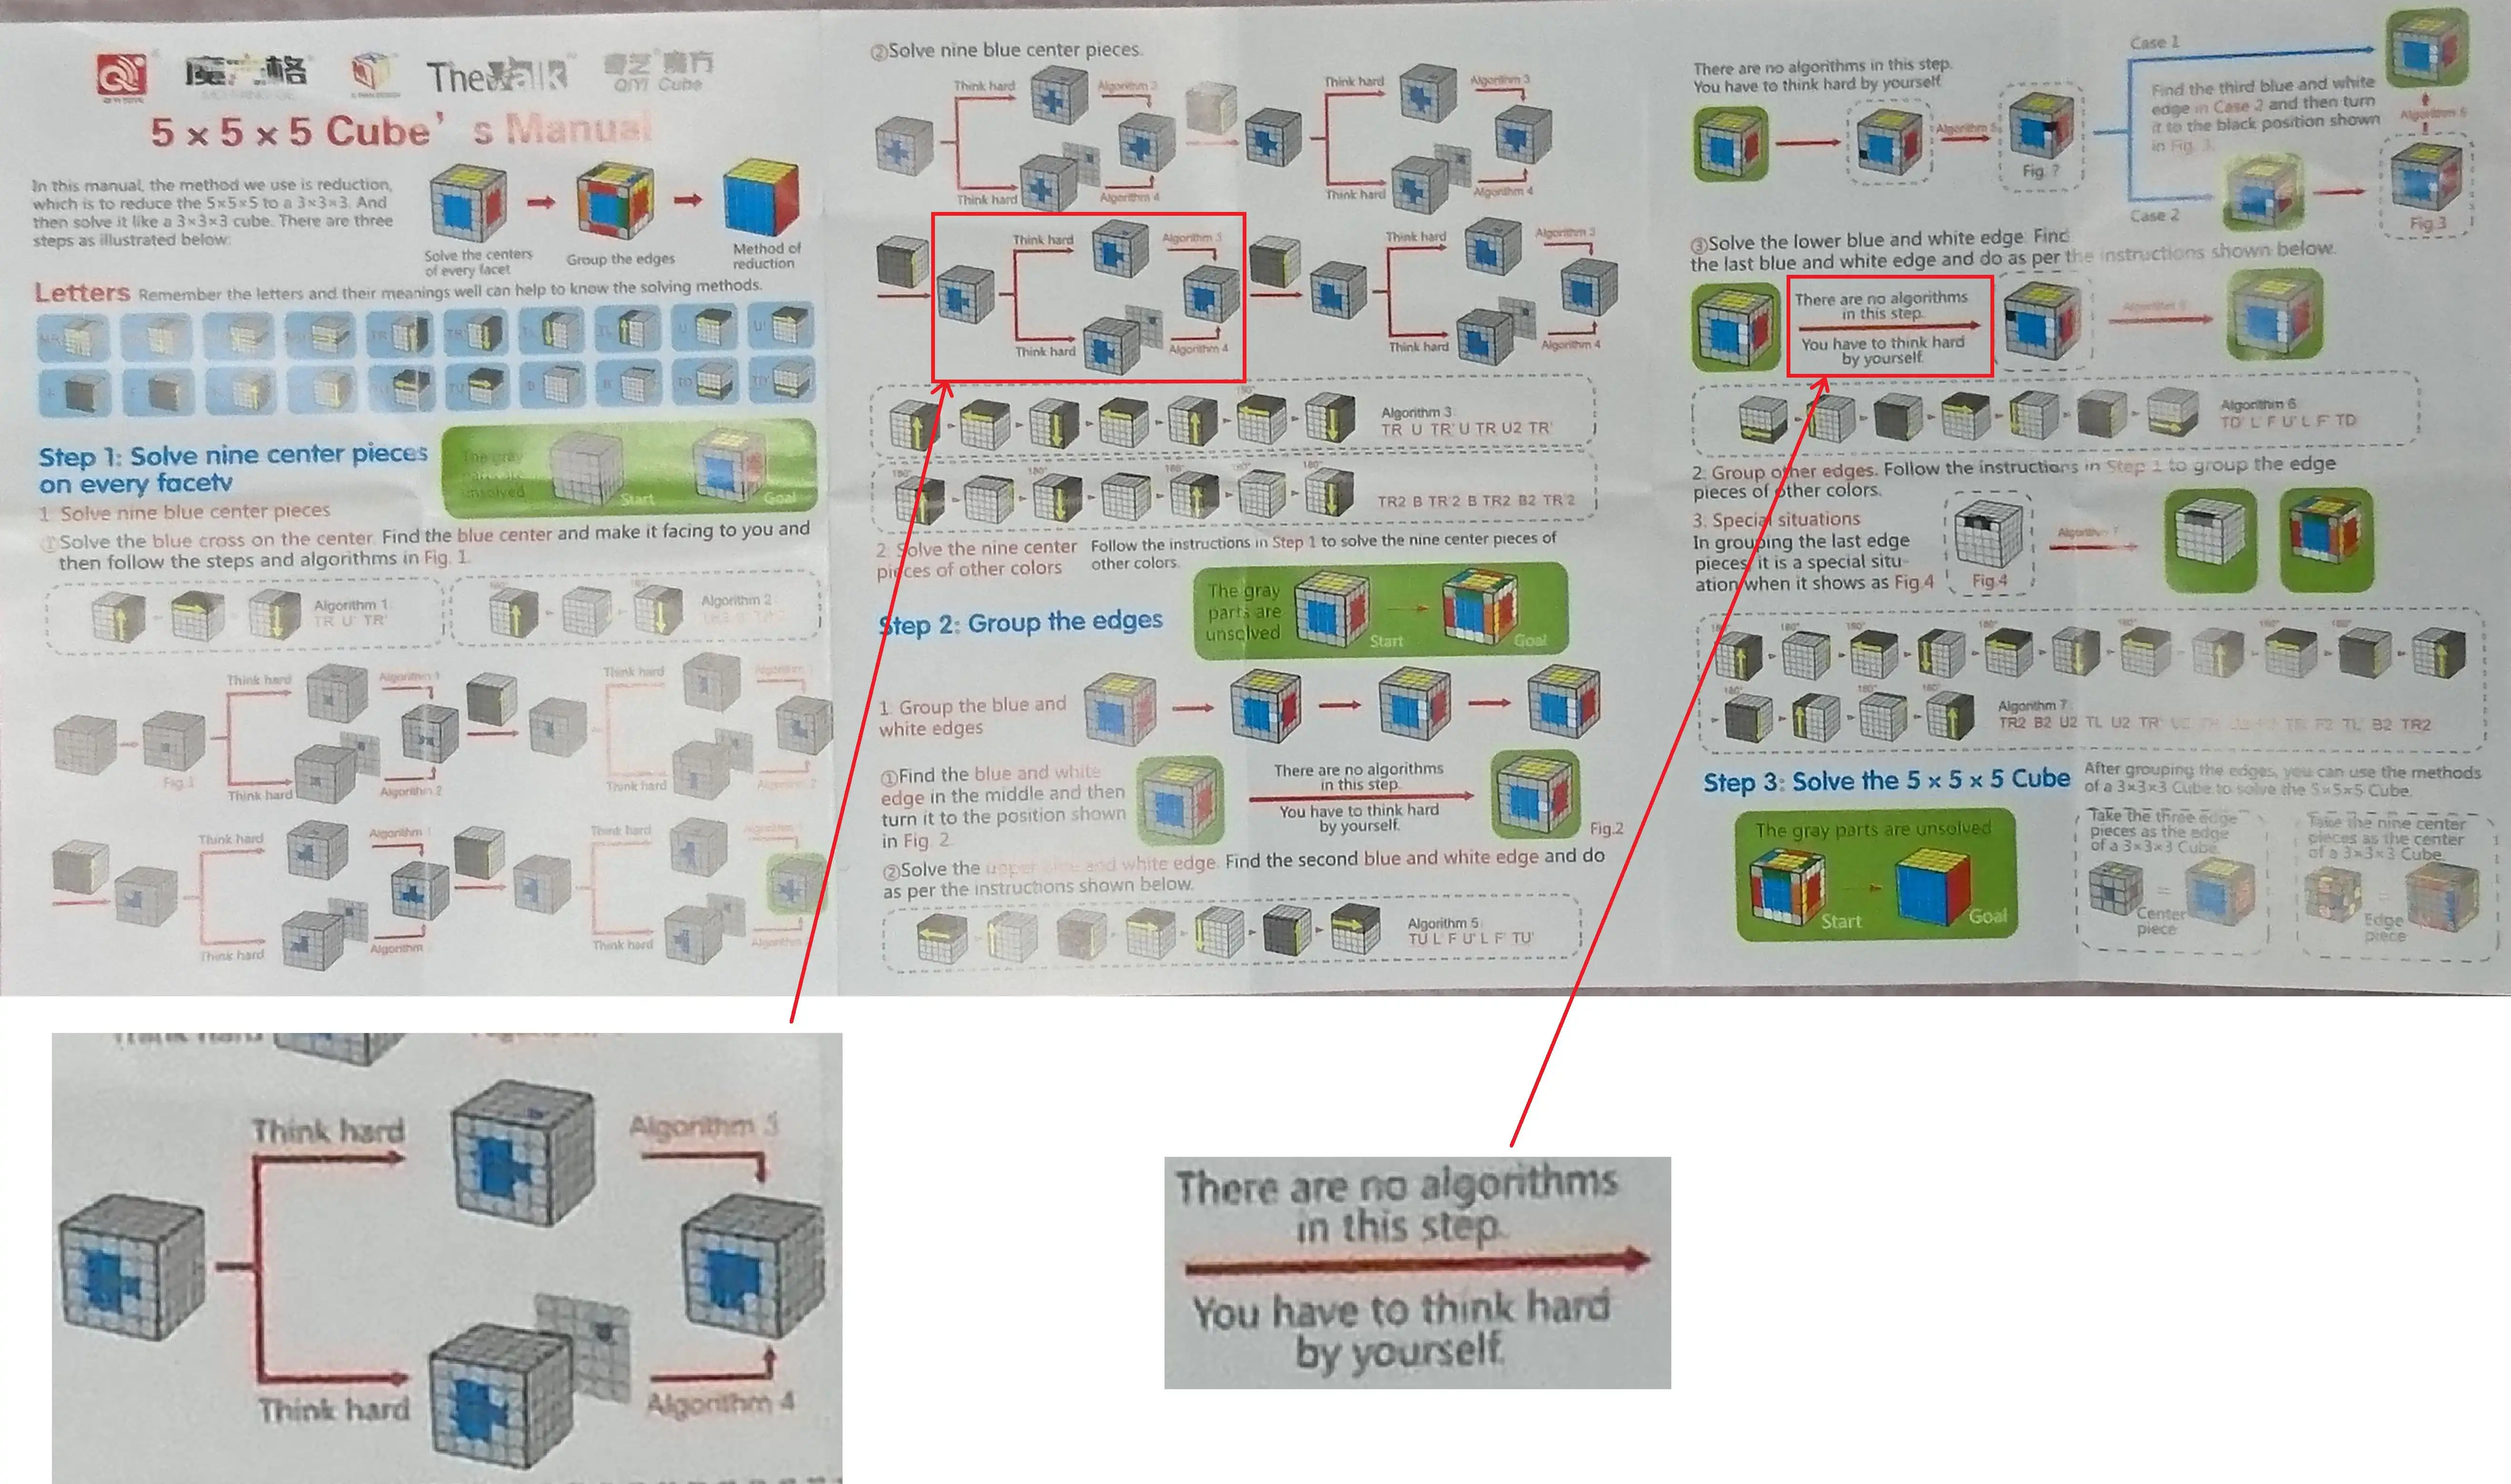
Unlocking the Mystery of the 5x5 Professor's Cube Anatomy
Learning how to solve a 5x5 Rubik's Cube, often affectionately known as the Professor's Cube, represents a major milestone for any puzzle enthusiast. Unlike the standard 3x3 puzzle or even the 4x4 variant, the 5x5 introduces fixed center pieces and multi-piece edge wings that demand a structured reduction method. If you can already master smaller twisty puzzles, stepping up to this five-layered behemoth is entirely achievable with patience and the right algorithms.
Before twisting any layers, you must understand the physical anatomy of the puzzle. A 5x5 cube consists of 98 total movable pieces, excluding the core structure: 8 corner pieces, 36 edge pieces (divided into 24 wing edges and 12 central edges), and 54 center pieces (9 on each of the 6 faces). Recognizing how these specific piece types interact with one another is the foundational secret to conquering the 5x5 without getting overwhelmed by the sheer number of visible stickers or plastic tiles.
The Center Pieces: Your Fixed Compass Points
The single most important rule to memorize before solving a 5x5 is that the exact center piece of each face never moves. It is rigidly attached to the internal spider core. Therefore, these six fixed center pieces dictate the permanent color scheme of your puzzle, just like they do on a traditional 3x3 cube.
- Fixed centers establish the definitive color orientation for every single face on the entire puzzle.
- Opposite color pairings remain constant: white opposes yellow, red opposes orange, and blue opposes green.
- Building the first center requires grouping nine individual squares into a solid 3x3 block of a single color.
- You must build centers in a specific, reliable order to avoid accidentally destroying previously solved work on adjacent faces.
- Using intuitive block-building techniques allows you to slide center pieces into place without memorizing complex sequences.
- Misaligned center colors will make the final 3x3 reduction phase impossible to finish correctly.
Many beginners stumble during this initial phase because they try to force pieces into place without planning two or three moves ahead. Always look for adjacent matching colors that can be paired up into simple 1x2 strips before inserting them into the main 3x3 center block. For further foundational knowledge on handling puzzle mechanics, check out this comprehensive rubik's cube beginner guide to brush up on basic notations and terminology.
The Edge Reduction Phase: Pairing Wing Edges
Once all six 3x3 centers are completed, your 5x5 cube effectively functions like an oversized 3x3 puzzle, provided you pair up all the scattered edge pieces. Each of the 12 edges on a 5x5 consists of three distinct components: a central edge piece and two flanking wing pieces. Your goal is to match each central edge with its two corresponding wing pieces so they act as a single, unified edge unit.
- Locate a wing piece and its matching central edge piece on the scrambled puzzle faces.
- Bring the two matching pieces into the same horizontal slice layer without disrupting your completed centers.
- Use safe slice-flip-slice algorithms to insert the second matching wing piece into position.
- Ensure that when you restore the slice layer, your completed centers remain completely intact.
- Repeat this matching process until you have successfully paired up the first 10 edge groups.
- Save the final two edge groups for specialized pairing procedures to avoid accidental misalignments.
- Double-check that all paired wing colors match their respective adjacent center block colors precisely.
- Keep track of flipped edges that may require subtle orientation adjustments during the final two edge combinations.
Mastering edge pairing is often considered the steepest learning curve of the 5x5 puzzle. Taking your time here pays massive dividends later in the solve, preventing frustrating troubleshooting sessions during the final reduction steps.
Part Interaction Matrix: How Centers, Edges, and Corners Relate
To successfully navigate a 5x5 solve, you must appreciate how different piece categories depend on one another. The table below outlines how these structural parts interact during the reduction process.
| Primary Component | Secondary Component | Relationship and Function |
|---|---|---|
| Fixed Centers | Wing Edges | Centers act as visual color anchors while wings are built around them. |
| Wing Edges | Central Edges | Wings merge with central edges to form 12 unified 3x3-style edge units. |
| Paired Edges | Corners | Once all edges are paired, corners and edges solve exactly like a 3x3. |
| Internal Core | Fixed Centers | The core anchors the entire puzzle, preventing center color drift. |
Tackling the Final Two Edges Without Panic
When you reach the stage where only two unpaired edges remain on your 5x5 cube, standard intuitive pairing techniques stop working. If you attempt a naive slice turn, you will inevitably break apart previously paired edges. This specific scenario requires a targeted edge-pairing algorithm that swaps wing pieces while leaving the rest of your hard-earned progress completely undisturbed.
- Position the two remaining unpaired edges in the front-top and front-bottom or front-right positions.
- Execute the classic 5x5 edge-pairing commutator algorithm to swap the mismatched wings cleanly.
- Watch closely as the algorithm aligns the matching colors without destroying your six solid centers.
- If an edge is flipped backward, apply a quick mid-step adjustment to correct its color orientation.
- Verify that all 12 edge units are fully formed before transitioning into the 3x3 reduction phase.
- Celebrate this milestone, because the hardest part of the 5x5 journey is now officially behind you.
If you have previously tackled smaller even-layered puzzles, you might notice similarities here. For instance, understanding parity concepts on smaller cubes helps clarify multi-piece movements; you can review the mechanics of even cubes by exploring how to solve a 4x4 rubik's cube for additional insight into slice-layer logic.
Transitioning to the 3x3 Reduction Phase
Congratulations on successfully finishing your centers and pairing all 12 edges! At this exact moment, your 5x5 Rubik's Cube is mathematically and physically identical to a standard 3x3 puzzle. You can now hold the outer layers of the cube and treat each 3x3 block of pieces as if it were a single, monolithic 3x3 sticker.
- Hold your puzzle with the white center facing downward to serve as your foundational base layer.
- Solve the white cross by placing the four corresponding white edge units around the bottom center.
- Insert the four bottom corner pieces into their proper slots to complete the first two layers (F2L).
- Form the top yellow cross using standard 3x3 algorithms while only turning the outermost layers.
- Orient the remaining top-face yellow corners to establish a uniform solid top color.
- Permute the top corners and edges to finish the primary 3x3 reduction solve smoothly.
Never turn the inner slice layers during this phase unless you are deliberately dealing with a parity anomaly. Keeping your outer layers strictly aligned ensures your reduction illusion remains intact.
Understanding and Fixing 5x5 Parity Anomalies
Even when you follow every step flawlessly, you may occasionally encounter situations that seem utterly impossible on a normal 3x3 cube. These frustrating quirks are known as parity errors. Because a 5x5 cube has fixed centers and multiple edge pieces, certain states can arise that violate standard 3x3 rules, requiring specialized algorithms to fix.
- OLL parity occurs when a single edge unit on your top face remains flipped upside down.
- PLL parity happens when two opposite edge units swap places while all corners remain correctly solved.
- Parity anomalies never happen on odd-layered 3x3 cubes, but they are common on 5x5 and 4x4 puzzles.
- Specialized algorithms must be memorized to flip individual wings or swap specific edge pairs cleanly.
- Executing a parity algorithm requires precise finger execution to avoid accidental layer misalignments.
- Always double-check your edge pairing before blaming parity; sometimes an edge was simply paired backward.
“Patience is the ultimate speedcubing tool. Rushing through edge parity algorithms on a 5x5 almost always results in a massive scramble that requires rebuilding your centers from scratch.”
Step-by-Step OLL Parity Resolution Protocol
The most common parity issue encountered by beginners solving a 5x5 is the Single Edge Flip, often referred to as OLL (Orientation of Last Layer) parity. When this happens, exactly one edge unit on your top layer has its wing colors inverted relative to the surrounding pieces.
- Hold your 5x5 cube with the anomalous flipped edge positioned directly at the front-top position.
- Slice your inner right or inner left layer downward to expose the hidden internal wing pieces.
- Perform a precise sequence of outer-layer quarter turns and inner-layer double quarter turns.
- Restore the slice layer back to its original upright position without twisting any unrelated faces.
- Repeat the sequence if necessary until the offending edge wing colors face the correct direction.
- Re-verify your top layer cross to ensure no other pieces were accidentally displaced during the fix.
According to historical puzzle documentation, mastering this specific algorithm unlocks your ability to tackle any high-order twisty puzzle with confidence. Regular practice builds muscle memory, transforming intimidating notation strings into fluid, effortless hand movements during casual solves or timed speedcubing sessions.
Essential Maintenance and Lubrication Tips for Smooth 5x5 Turning
A high-order puzzle like the 5x5 contains dozens of moving internal friction points that can dry out or catch over time. Proper maintenance guarantees that your puzzle turns effortlessly without locking up during fast executions.
- Disassemble only when strictly necessary, keeping track of inner core pieces and internal mechanism alignment.
- Apply a few drops of silicone-based speedcube lubricant directly onto the tracks and core components.
- Adjust the tension screws evenly on all six center caps to find your ideal balance of stability and corner cutting.
- Wipe away accumulated dust and debris from the stickerless or tiled outer surfaces regularly using a microfiber cloth.
- Store your 5x5 in a protective cube pouch or case to prevent accidental drops and surface scratches.
Taking care of your hardware directly translates into better solving times and a much more satisfying tactile experience every time you sit down to practice.