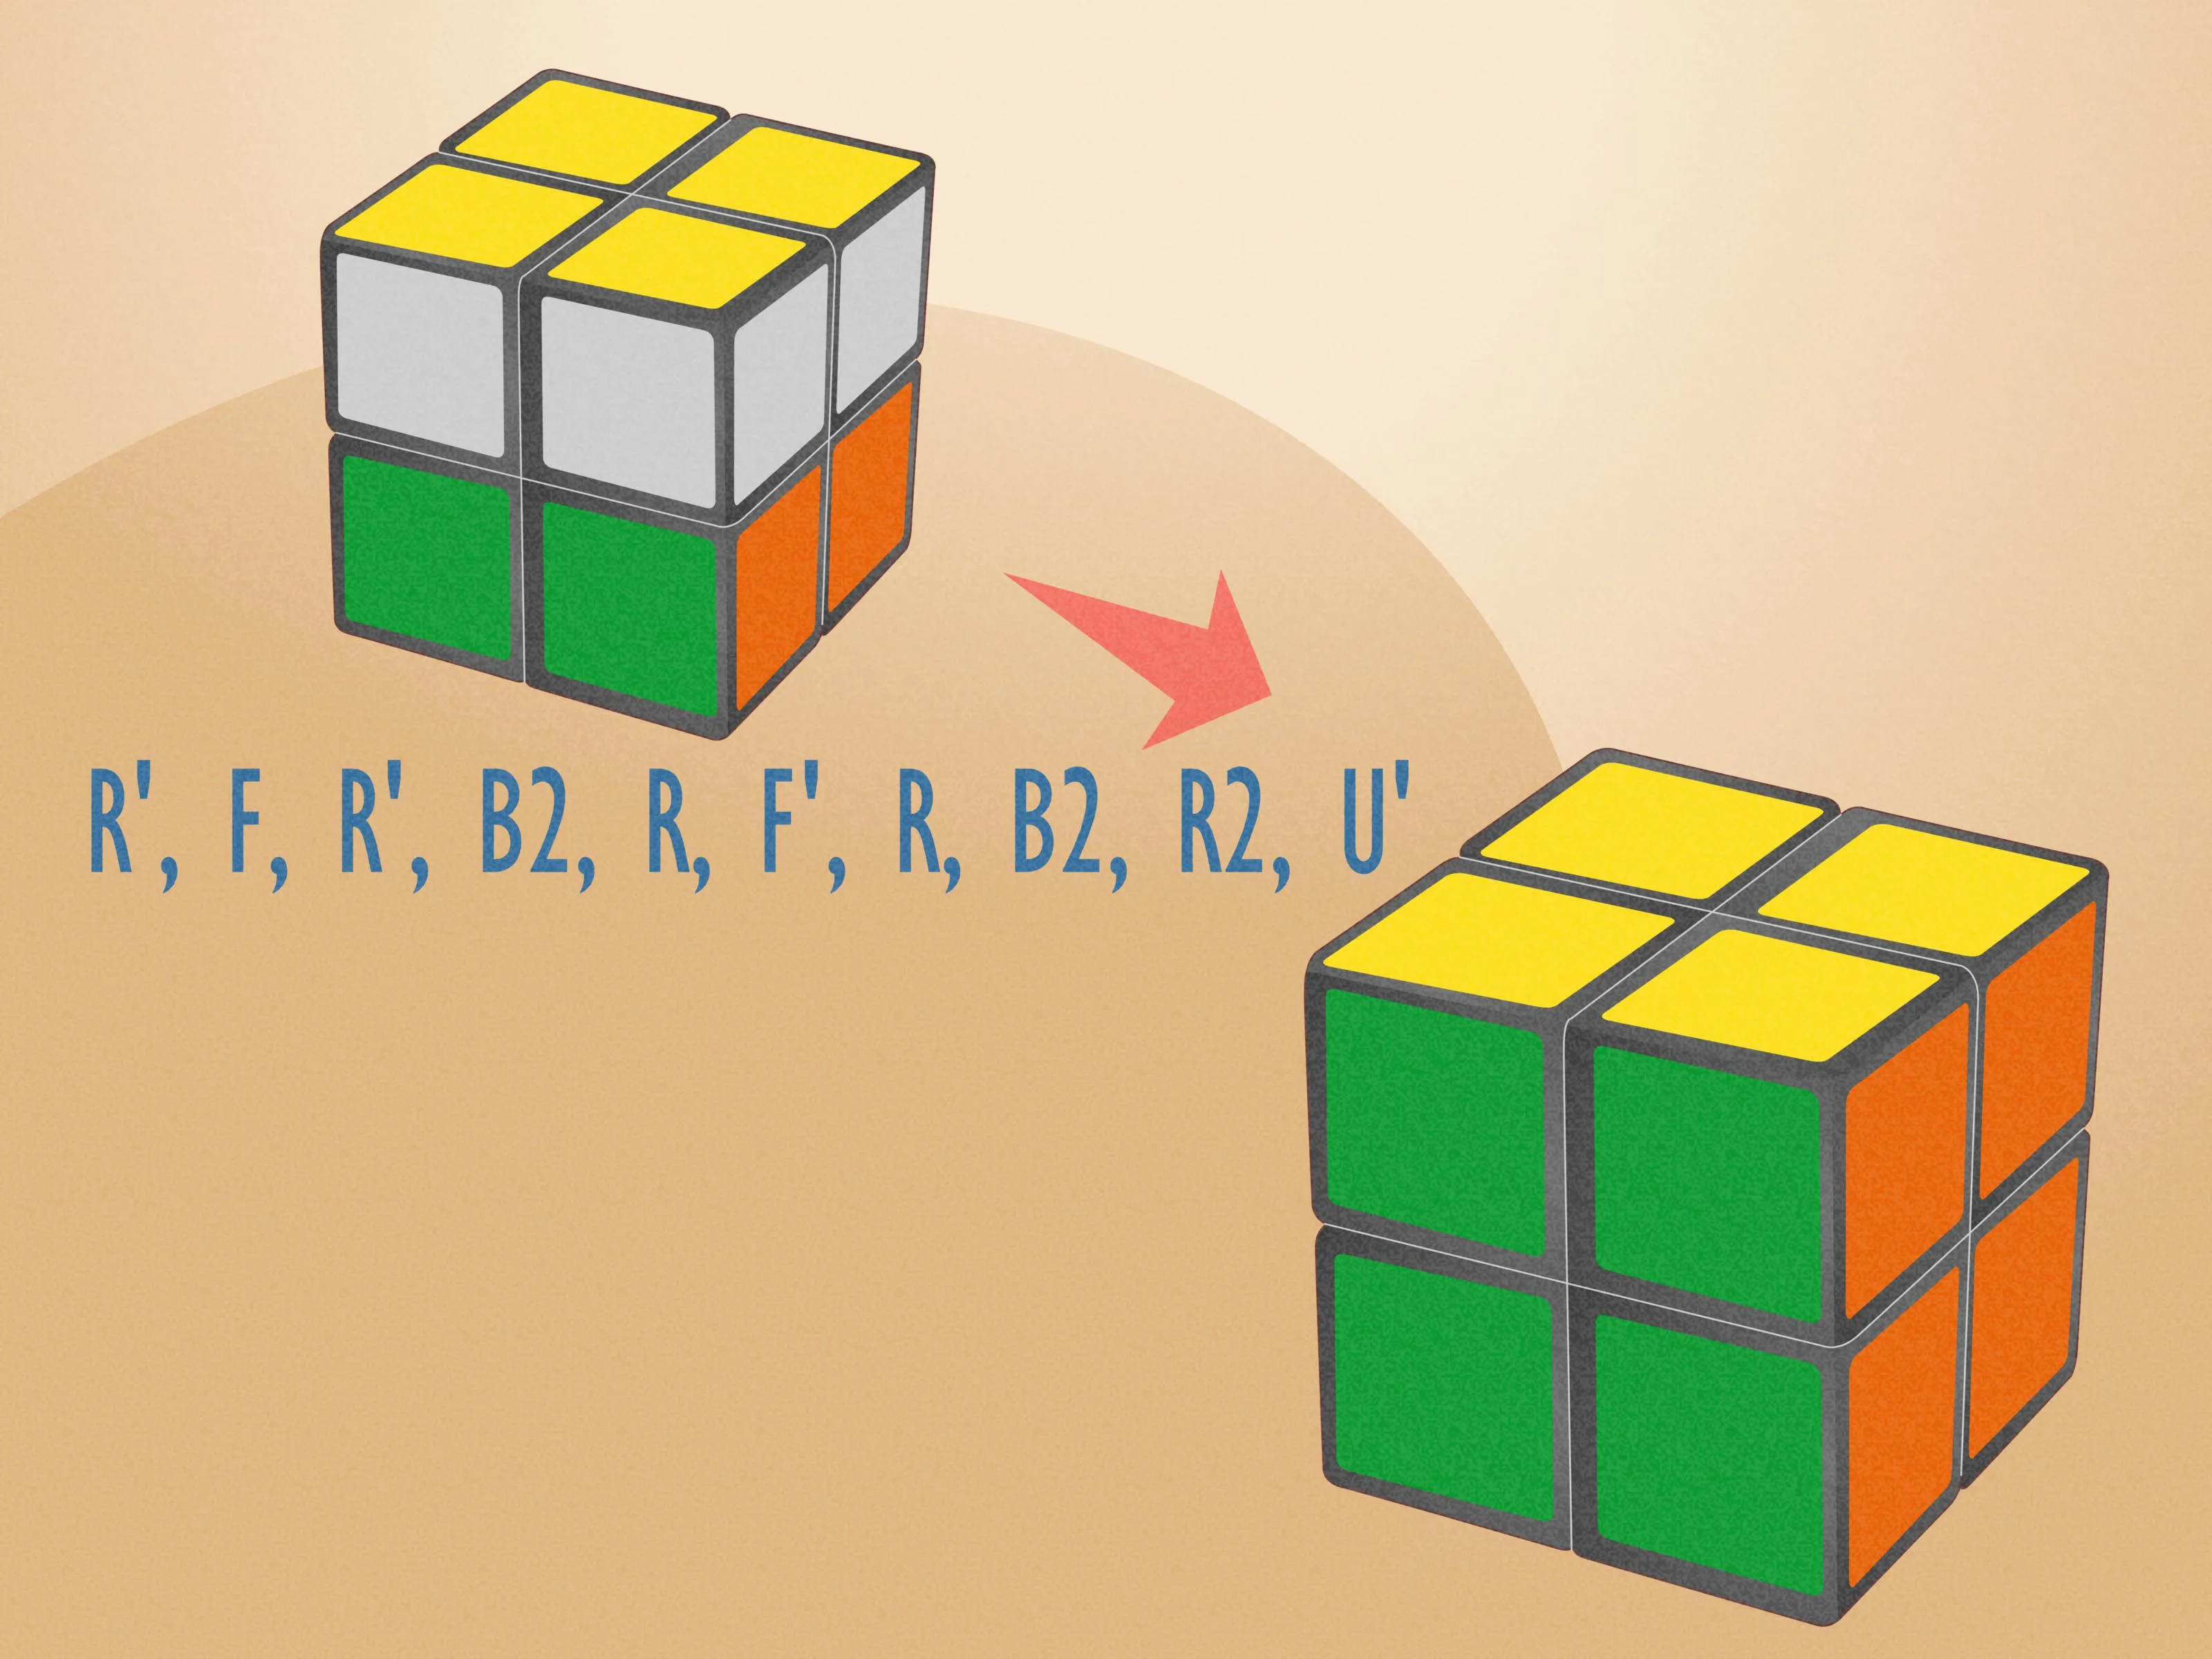
Understanding the 2x2 Rubik's Cube Mechanics
The 2x2 Rubik's cube, often called the Pocket Cube, is the perfect entry point into the world of twisty puzzles. Unlike the standard 3x3 cube, the 2x2 version lacks fixed center pieces, which can make it feel a bit disorienting for newcomers at first. However, because it only has eight corner pieces and no edges or centers, the complexity is significantly lower, making it an ideal challenge to master before moving on to more advanced designs. Understanding that the cube essentially functions as a group of eight corner pieces is the key to unlocking its secrets.
To solve the cube successfully, you must first familiarize yourself with the notation used in cubing. Each face is represented by a letter: R (Right), L (Left), U (Up), D (Down), F (Front), and B (Back). When you see a letter followed by an apostrophe (like R'), it means you should rotate that face counter-clockwise. A standard letter (like R) implies a clockwise rotation. Mastery of this language is not just for speed; it is the fundamental bridge between looking at a scrambled mess and performing the elegant dance of algorithmic movement.
The Core Components of the Puzzle
- The cube consists of eight corner pieces that move relative to each other.
- Since there are no center pieces, any corner you place can serve as a reference point for the rest of the puzzle.
- The pieces are connected by an internal mechanism that allows for smooth rotation and tension adjustment.
- Learning the standard notation will help you follow any algorithm provided in this guide without frustration.
- Practice holding the cube with a consistent orientation to avoid confusion during the solve.
- Internal tension springs can be adjusted if your cube feels too loose or too stiff during the turning process.
- Every corner has three stickers, meaning every piece is unique in its placement requirements.
Phase One: Solving the First Layer
The first step in solving any 2x2 cube is to complete the bottom layer. You don't need a specific color to start, but white is the standard convention for beginners because it provides high contrast against the other colors. Pick one corner that has white on it and place it on the bottom layer. From there, you need to find another corner piece that shares a color with the first one and bring it into the correct adjacent position. This creates a foundation upon which the rest of the puzzle relies.
- Identify a corner piece with a white sticker and position it on the bottom face so it acts as your anchor.
- Find a second corner piece that has a white sticker and a color matching the first piece's side.
- Use the
R' D' R Dsequence, often called the "sexy move," to maneuver pieces into the bottom layer until they seat correctly. - Ensure that the side colors of the two adjacent corners match the side colors of the center-adjacent pieces on the same layer.
- Repeat this process for the final two corners of the bottom layer to complete the first face and the matching side colors.
- Check that the entire first layer is flush and that the side colors form a consistent ring around the cube.
Comparing Cubing Methods for Beginners
When you start learning, you might wonder if there are different ways to approach the puzzle. While the beginner method is the most reliable for your first solve, other techniques exist for speedcubing. The table below outlines how different approaches compare in terms of learning curve and efficiency. Choosing the right path depends on whether you value pure speed or simply want to understand the mechanics of the puzzle thoroughly.
| Method | Learning Curve | Algorithm Count | Best For |
|---|---|---|---|
| Beginner Layer-by-Layer | Easy | 2-4 | First-time solvers |
| Ortega Method | Moderate | 12 | Intermediate speedcubing |
| CLL/EG Methods | Hard | 42+ | Competitive speedcubing |
Addressing Common Mistakes During the Solve
Many beginners find themselves getting stuck because they lose track of the cube's orientation. It is incredibly easy to rotate the entire cube in your hands while performing an algorithm, which causes the colors to end up in the wrong places. Always keep the same face pointing toward you and the same face pointing up throughout the entire algorithm. If you lose your orientation, the algorithm will not result in the desired outcome, leading to a scramble that feels impossible to fix.
- Avoid turning the cube in your hands midway through a sequence unless specified by the notation.
- Check that your bottom layer is fully completed before moving to the top layer; skipping steps leads to parity issues.
- If a piece seems impossible to place, verify that you are holding the correct face toward you as per the algorithm diagram.
- Do not force the pieces if the cube feels stuck, as this can damage the internal tension or snap a plastic tab.
- Double-check your algorithm sequence if the pieces are not landing where you expect them to; usually, a single mistake in rotation is the culprit.
- Consistency in grip is essential to maintaining the orientation of your axes.
"Speed is the byproduct of accuracy, not the goal. Focus on moving your fingers with precision before attempting to break any records. A slow, correct turn is infinitely better than a fast, incorrect one." — Anonymous Cubing Enthusiast
When you encounter a hurdle, resist the urge to scramble the cube completely and start over. Most errors in the 2x2 solve can be corrected by simply reversing the last sequence of moves you performed. By building a habit of tracing your steps, you train your brain to recognize the relationship between piece movement and color patterns on the surface.
The Second Layer: Orienting the Top Pieces
Now that the bottom layer is finished, the focus shifts to the top layer. In the 2x2 puzzle, the top layer is oriented using a sequence that permutes the corners until they are in the correct place. You are not trying to match the colors yet, just ensuring that every corner has its yellow sticker facing upward. This is often referred to as the 'Yellow Face' stage of the solve.
- Hold the cube so the completed white layer is on the bottom.
- Apply the algorithm
R' D' R Duntil you see the yellow sticker facing up on the top-right corner. - Rotate only the top face (the
Uface) to bring an unsolved corner into the top-right position. - Repeat the
R' D' R Dsequence for each corner until all four corners have their yellow stickers facing upwards. - Do not panic if the bottom layer appears to be temporarily scrambled during this process; it will fix itself once all corners are oriented.
- Once all four corners have yellow on top, ensure the side colors are aligned correctly.
Advanced Tips for Faster Solving
Once you are comfortable with the basic steps, you can begin to optimize your performance. Speedcubers often memorize 'finger tricks,' which are specific ways of moving the cube faces using only the fingers rather than the whole wrist. This reduces drag and increases the speed at which you can execute algorithms. Another way to improve is through 'look-ahead' techniques, where you observe the next move while currently performing the present one.
- Practice executing your algorithms in a fluid motion without pausing between turns.
- Use a high-quality lubricant specifically designed for puzzles to reduce friction between the internal pieces.
- Study the Ortega method to reduce the number of steps required to complete the cube from two layers to just two phases.
- Keep a log of your times to track your progress and identify which specific algorithms are slowing you down.
- Watch video tutorials of professional solvers to see how they grip the cube for maximum efficiency.
- Try to solve the cube using different color schemes to ensure you aren't reliant on white always being the bottom color.
Daily Practice Regimen for Beginners
Consistency is the secret to mastering any physical skill, including cubing. A structured approach ensures that you aren't just repeating your mistakes, but actively refining your technique. By dedicating just fifteen minutes a day to deliberate practice, you will notice a significant improvement in your muscle memory within a week.
- Start your session by scrambling the cube thoroughly to ensure you aren't starting from a familiar position.
- Perform the first layer slowly, focusing on finding the corners as quickly as possible.
- Execute the second layer algorithms while paying close attention to your finger placement.
- Time your solve and record it in a notebook or on a spreadsheet to visualize your growth over time.
- End your session by reviewing one specific algorithm that you feel is 'clunky' or slow.
- Challenge yourself by trying to solve the cube with your eyes closed after you have mastered the visual process.
Common Pitfalls and How to Avoid Them
Even seasoned cubers encounter hurdles when transitioning from the 3x3 to the 2x2. One of the most frequent mistakes is over-rotating the cube during the final layer. When you are executing the R' D' R D sequence, it is easy to accidentally turn the entire cube in your hands, which can disorient your perspective of the corners. To avoid this, keep your focus on the stationary center piece—even though the 2x2 lacks physical center pieces, imagine a fixed point in space to keep your orientation consistent.
Another common error involves finger tricks. Beginners often use their entire hand to rotate a face, which is inefficient and slows down your solve time. Instead, focus on using your index and middle fingers to flick the layers. If you find your fingers cramping or hitting other pieces, you are likely holding the cube too tightly. A relaxed grip is essential for fluid, high-speed movement.
Comparing the 2x2 and 3x3 Solving Methodologies
While the 2x2 is often considered a "lite" version of the 3x3, the internal logic differs significantly. In a 3x3, you have to manage edges and centers, which provides structural anchors for your solve. In a 2x2, you are only dealing with eight corners, meaning every move affects multiple pieces simultaneously. This makes it an excellent training ground for look-ahead—the ability to plan your next move while still executing the current one.
If you plan to move on to competitive cubing, remember that the 2x2 requires a much higher level of pattern recognition. Since the cube is smaller, the permutations are fewer, which allows for advanced techniques like the Ortega Method. Once you are comfortable with the beginner layer-by-layer approach, look into Ortega, which involves solving the first layer, orienting the last layer, and finally permuting both layers simultaneously. This can shave seconds off your time and provides a deeper understanding of how the cube's geometry functions under pressure.