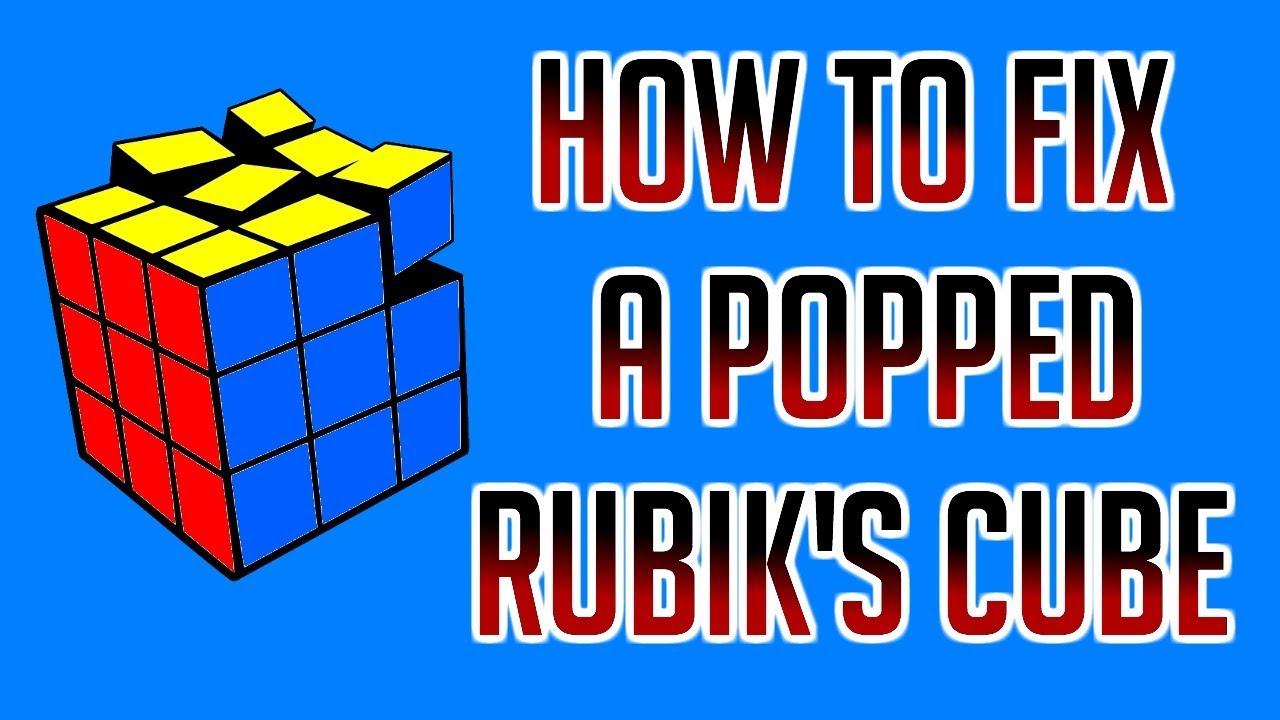
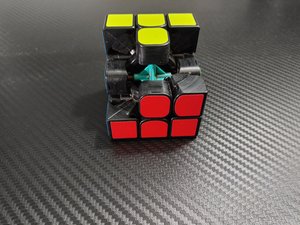
There is no sound quite as heart-stopping for a speedcuber as the sudden pop of a puzzle disassembling in mid-solve. One moment you are executing a flawless algorithm, chasing a personal best, and the next, your beloved cube has exploded into a chaotic mess of plastic shards across the floor. Panic sets in immediately. Is it broken? Did you just destroy a hundred-dollar piece of engineering? Take a deep breath. In 2026, with modern cube technology and refined repair techniques, fixing a popped cube without breaking pieces is not only possible but a rite of passage for every enthusiast.
Whether you are a beginner in Chicago learning the basics or a seasoned competitor in Tokyo preparing for the World Championship, understanding how to reassemble your puzzle is an essential skill. This comprehensive guide will walk you through the anatomy of a speed cube, the step-by-step process of reassembly, and the critical adjustments needed to prevent future pops. By the end of this article, you will not only have a fully functional cube but one that is solved and optimized for peak performance.
Understanding the Anatomy of a Modern Speed Cube
Before attempting any repair, it is crucial to understand what you are working with. The days of the rigid, screw-less Rubik's Cubes from the 1980s are long gone. Modern speed cubes, particularly those popular in 2026, utilize sophisticated internal mechanisms designed for smoothness, corner-cutting, and stability. However, even the most advanced designs can succumb to physics if tensions are misaligned or turning is too aggressive.
The Core Mechanism and Piece Types
At the heart of every 3×3 cube lies the core mechanism. This central piece acts as the anchor for the entire puzzle. Attached to this core are six center caps, which hide the tension screws responsible for holding the cube together. Unlike the fixed centers of old toys, modern cores often feature adjustable springs or magnetic systems that allow cubers to fine-tune the tightness of each face.
The puzzle itself is composed of three distinct types of movable pieces, each with a specific role and orientation:
- Center Pieces: There are six of these, each displaying a single color. They define the color of their respective face and remain fixed relative to one another. In a standard scheme, white is opposite yellow, blue is opposite green, and red is opposite orange.
- Edge Pieces: Twelve pieces make up the edges, each featuring two colors. These fit between two center pieces and must maintain their specific orientation; an edge with red and blue cannot be placed where a red and green edge belongs.
- Corner Pieces: The eight corners of the cube each possess three colors. Like edges, they must be inserted into the correct slot relative to the adjacent centers to ensure the cube can be solved logically later.
Understanding these components is vital because a "popped" cube usually involves one or more of these pieces detaching from the core's grip. In 2026, many high-end cubes also feature magnetic positioning, where small magnets inside the pieces help align layers. While this adds stability, it does not make the cube immune to popping if the mechanical tension is too loose.
Why Do Cubes Pop in 2026?
Despite advancements in design, such as the "torpedo" mechanisms found in many big cubes (4×4 and above) that physically block pieces from flying out, popping remains a common issue. The primary causes generally fall into three categories:
- Loose Tensions: If the springs inside the core are not tightened sufficiently, the friction holding the pieces in place decreases. During a fast turn, centrifugal force can easily dislodge an edge or corner.
- Aggressive Turning Styles: Many new cubers rely heavily on "corner-cutting," forcing the cube to turn before the layers are fully aligned. While modern cubes can handle 45 degrees of corner cutting, excessive force or misalignment during a turn places immense stress on the internal tracks, leading to a pop.
- Lack of Lubrication: A dry cube creates high friction, causing pieces to catch and jerk unexpectedly. This jerky motion can snap a piece out of its track just as easily as a loose tension can.
Recognizing the cause helps in preventing recurrence, but first, we must address the immediate crisis: the pile of plastic on your desk.
Step-by-Step Guide to Reassembling Your Cube
Fixing a popped cube is surprisingly straightforward if you follow a logical order. The golden rule of cube repair is simple: rebuild the cube layer by layer, starting from a solid foundation. Attempting to shove pieces back in randomly is the fastest way to break plastic tabs or damage the core.
Step 1: Assess the Damage and Gather Pieces
The first action you should take is to stop and breathe. Do not try to force anything back together yet. Spread the pieces out on a clean, flat surface. Inspect each piece carefully for cracks, jagged edges, or broken internal tabs. In rare cases, a violent pop can cause structural damage, though this is uncommon with quality 2026 models.
Count your pieces to ensure nothing is lost under the couch or carpet. A standard 3×3 cube must have:
- 1 Core assembly
- 6 Center pieces
- 12 Edge pieces
- 8 Corner pieces
If you are missing a piece, the cube cannot be reassembled correctly. Assuming all pieces are present and intact, group them by type. Separate the corners from the edges. This organization will streamline the rebuilding process significantly.
Step 2: Establish the Base Layer (The White Cross)
Most tutorials recommend starting with the white face, simply because it provides a high-contrast visual base, though you can start with any color. Begin by attaching the four white edge pieces to the white center cap on the core.
To insert an edge piece:
- Rotate the center cap of the face you are working on so it is at a 45-degree angle relative to the adjacent layer.
- Align the edge piece so its colors match the corresponding center pieces on the core. For example, if you are inserting a white-red edge, ensure the red sticker faces the red center.
- Gently slide the edge piece into the gap. You should feel a slight click as the internal rails engage with the core mechanism.
Repeat this for all four white edges until you have formed a perfect white cross. Ensure that the side colors of these edges align perfectly with the adjacent center pieces. If they don't, the cube will be unsolvable later without taking it apart again.
Step 3: Insert the First Layer Corners
With the cross complete, lay the cube flat on the table with the white face down. This prevents the newly inserted edges from popping out while you work on the corners. Locate the four white corner pieces.
Inserting a corner requires a bit more dexterity than an edge:
- Identify the correct slot for the corner based on its three colors (e.g., White-Red-Green goes between the White, Red, and Green centers).
- Hold the corner piece so the white sticker is facing away from the white center (usually facing up or to the side).
- Angle the piece at roughly 45 degrees and slide it into the gap between the two relevant edge pieces.
- Once the bottom hook of the corner catches the core, twist the piece down until it snaps flush with the rest of the layer.
Once all four corners are inserted, your entire first layer (the white face and the bottom row of the other faces) should be complete and solid. Flip the cube over to verify that the "T" shapes formed by the center and edge colors on the sides are correct.
Step 4: Building the Middle Layer
Now comes the second layer, which consists entirely of edge pieces. Look for the four edge pieces that do not contain yellow (assuming yellow is your final top color). These belong in the middle tier.
The insertion technique is similar to the first layer but requires precise alignment:
- Rotate the top layer to align the non-yellow color of the edge piece with its matching center.
- Tilt the target slot slightly by turning the adjacent face 45 degrees.
- Slide the edge piece in. Because the first layer is already locked in, these pieces often require a gentle wiggle to seat properly without disturbing the bottom layer.
If a piece feels stuck, do not force it. Check that you are trying to insert the correct edge into the correct slot. Forcing the wrong piece can shear off the plastic rails inside the cube, rendering the piece useless.
Step 5: Completing the Final Layer
The last layer is the most delicate part of the reassembly process. You have four corners and four edges left to install. Start with the corners.
Rotate the top layer center cap 45 degrees to create space. Pick up a corner piece, align its colors with the centers below it, and slide it in at an angle. Twist it down until it locks. Repeat this for three of the four corners.
For the final three edge pieces, follow the same angled insertion method. However, when you reach the very last edge piece, you will encounter resistance. This is normal. The cube is now a closed loop, and the final piece has nowhere to expand.
- Rotate the entire top layer slightly to maximize the gap.
- Insert the final edge at a steep angle.
- Apply firm, steady pressure to push it home. Do not use excessive brute force. If it doesn't go in after a few seconds of reasonable pressure, remove it and check if a previous piece was inserted incorrectly or if the tension is too tight.

Congratulations! If you have followed these steps, your cube is now physically reassembled. Even better, because you built it piece by piece in the correct orientation, your cube is now in a solved state. You didn't need to know any algorithms to fix it; you just needed patience and logic.
Post-Repair Optimization: Tuning and Lubrication
Simply putting the pieces back together isn't enough to guarantee a smooth solving experience in 2026. A reassembled cube often feels stiff or uneven because the internal tension settings may have shifted during the pop, or the pieces were dry. To ensure your cube performs at a professional level, you must perform post-repair maintenance.
Adjusting Tension Screws
Every modern speed cube features tension adjustment screws hidden beneath the center caps. These screws control the compression of the internal springs.
- Too Loose: The cube feels floaty and is prone to popping again.
- Too Tight: The cube feels sluggish, locks up frequently, and strains your wrists.
Using a small Phillips head screwdriver, remove the center caps. Turn the screws clockwise to tighten or counter-clockwise to loosen. The general rule of thumb for 2026 setups is to aim for even tension across all six faces. Tighten each screw until the cube feels snug but can still perform a 45-degree corner cut without locking up. Many experts recommend tightening the screw until the spring is compressed about halfway, then backing it off a quarter-turn for optimal flow.
The Importance of Proper Lubrication
Friction is the enemy of speed. If your cube popped due to catching or jerky movement, it likely needed lubrication. In 2026, silicone-based lubricants are the industry standard. Avoid using household oils like WD-40 or cooking oil, as these can degrade the plastic over time.
Apply a few drops of silicone lube directly onto the internal tracks of the core and the contact points of the pieces. For a full reassembly, it is best to lube the core generously before inserting the first layer. As you build the cube, the lube distributes itself evenly. After reassembly, perform several rapid turns to work the lubricant into the mechanism. A well-lubed cube should turn silently and smoothly, with layers gliding effortlessly into place.
Magnetic Alignment Checks
Many premium cubes released in 2026 come with built-in magnets. These magnets provide a satisfying "snap" when layers align, improving accuracy. After fixing a popped cube, ensure that the magnetic polarity is correct. If you notice that layers repel each other instead of attracting, a piece may have been inserted upside down or a magnet has shifted. While rare, if the magnetic feel is "wrong," you may need to disassemble the specific piece to check the magnet orientation.
Preventing Future Pops: Expert Strategies
Fixing the cube is only half the battle; keeping it together is the real challenge. Whether you are practicing in a quiet room in London or competing in a bustling hall in New York, avoiding pops is essential for maintaining momentum and confidence.
Mastering Smooth Turning Techniques
The most common cause of pops is user error, specifically rough turning. Aggressive solvers often try to force a turn before the previous layer has settled. This creates a "misalignment" that stresses the internal plastic rails.
- Focus on Accuracy: Instead of turning as fast as possible, focus on turning smoothly. Ensure layers are aligned before initiating the next move.
- Controlled Corner Cutting: Learn the limits of your specific cube. While a high-end 2026 cube might handle 50+ degrees of corner cutting, relying on this constantly increases pop risk. Aim for clean, aligned turns whenever possible.
- Grip Pressure: Holding the cube too tightly can deform the plastic slightly, altering the geometry and causing pieces to bind and pop. Maintain a relaxed but secure grip.
Regular Maintenance Routines
Just like a car needs an oil change, your cube needs regular maintenance.
- Clean Regularly: Dust and hair can accumulate inside the mechanism, increasing friction. Every few months, consider doing a quick clean-out by removing a center cap and blowing compressed air into the core.
- Re-lube Periodically: Lubricant breaks down over time. If your cube starts feeling scratchy or noisy, it's time for a fresh drop of lube.
- Check Tensions: Springs can lose their tension over months of heavy use. Check your screw tightness weekly if you are an active solver.
Choosing the Right Hardware
Not all cubes are created equal. Cheap, knock-off puzzles often lack the structural integrity and precision engineering required for speedcubing. They are far more prone to popping and breaking. Investing in a reputable brand known for stability—such as those featuring anti-pop technologies like internal rails or magnetic locks—is a wise decision for serious cubers. In 2026, the market offers a wide range of options tailored to different turning styles, ensuring there is a stable cube for everyone.
Troubleshooting Common Reassembly Issues
Even with a guide, things can go wrong. Here are solutions to the most frequent problems encountered during the repair process.
The Last Piece Won't Fit
This is the most frustrating scenario. If the final edge refuses to go in:
- Check Alignment: Verify that every other piece is perfectly seated. A slightly protruding corner from the first layer can block the final insertion.
- Loosen Tension: Temporarily loosen the tension screws on the adjacent faces to create more internal space. Once the piece is in, retighten them.
- Angle Adjustment: Try rotating the top layer further to open the gap wider before pushing the piece in.
Pieces Feel Loose After Reassembly
If the cube feels wobbly:
- Your tension screws are likely too loose. Tighten them incrementally (quarter turns) until the desired firmness is achieved.
- Ensure the springs are seated correctly inside the core. A displaced spring can cause uneven tension.
The Cube Seems Unsolvable
If you finish building the cube but the colors don't match up (e.g., two greens on one face):
- You likely inserted a piece in the wrong orientation or slot. Unfortunately, the only fix is to disassemble the incorrect section and rebuild it correctly. Double-check that edge and corner colors match the fixed centers.
Frequently Asked Questions
Q: Can I glue a popped piece back together if it's broken?
A: Generally, no. Gluing pieces alters the geometry and makes the cube unsolvable or unturnable. If a piece is cracked but intact, it might hold together temporarily, but replacement is the safest option. Most manufacturers sell spare parts kits for this exact reason.
Q: Does fixing a popped cube count as cheating in a competition?
A: Yes, if done during a timed solve. In official World Cube Association (WCA) regulations, if a cube pops during a solve, the competitor must stop the timer, fix the cube, and continue. However, the time taken to fix it counts against the total solve time. Pre-solving (building the cube to look solved before the timer starts) is strictly prohibited.
Q: How often should I lubricate my cube?
A: It depends on usage. Heavy users who practice daily may need to lube their cube every 2-3 weeks. Casual users might only need it every few months. The tell-tale sign is when the turning becomes scratchy or the cube starts locking up frequently.
Q: Is it normal for big cubes (4×4, 5×5) to pop more often?
A: Historically, yes. Big cubes have more moving parts and complex internal mechanisms, making them inherently less stable than 3x3s. However, modern 2026 designs with "torpedo" anti-pop mechanisms have drastically reduced this issue. Proper tensioning is even more critical for big cubes.
Q: Can I fix a popped cube without taking it completely apart?
A: If only one or two pieces have popped and the rest of the structure is intact, you can often pop them back in directly by angling the layers. However, if the cube has completely disassembled ("exploded"), you must follow the layer-by-layer reconstruction method described in this guide.
Conclusion
A popped cube is not a disaster; it is a learning opportunity. By mastering the art of how to fix a popped cube without breaking pieces, you gain a deeper appreciation for the mechanics of your puzzle and the skills to maintain it for years to come. The process of reassembly, while initially daunting, reinforces your understanding of the cube's anatomy and color orientation.
In 2026, with advanced materials and magnetic technologies, cubes are more durable than ever, but they still require care and respect. Remember to approach repairs with patience, tune your tensions correctly, and keep your mechanism well-lubricated. With these practices, you will minimize pops and maximize your solving potential. So, the next time you hear that dreaded pop, don't panic. Smile, gather your pieces, and rebuild your path to a new personal best.
References
- wikiHow — How to Fix a Popped Rubik's Cube: 8 Steps (with Pictures), 2024
- iFixit — How to Fix a Popped Rubik's Cube Repair Guide, 2025
- Mangalls — How to Fix a Popped Speed Cube: All Cube Types Covered, 2026
- SpeedCubeShop — Speed Cube Pops – How to Fix and Avoid, 2021
- Cubelelo — Speedcube Pops – How To Fix And Avoid, 2023
- Mytour — How to Repair a Popped Rubik's Cube: 8 Easy Steps, 2026
- Ruwix — How To Take Apart The Rubik's Cube And Put It Back Together, 2025
- TheCubicle — Rubik's Cube Troubleshooting FAQ and Solutions, 2024