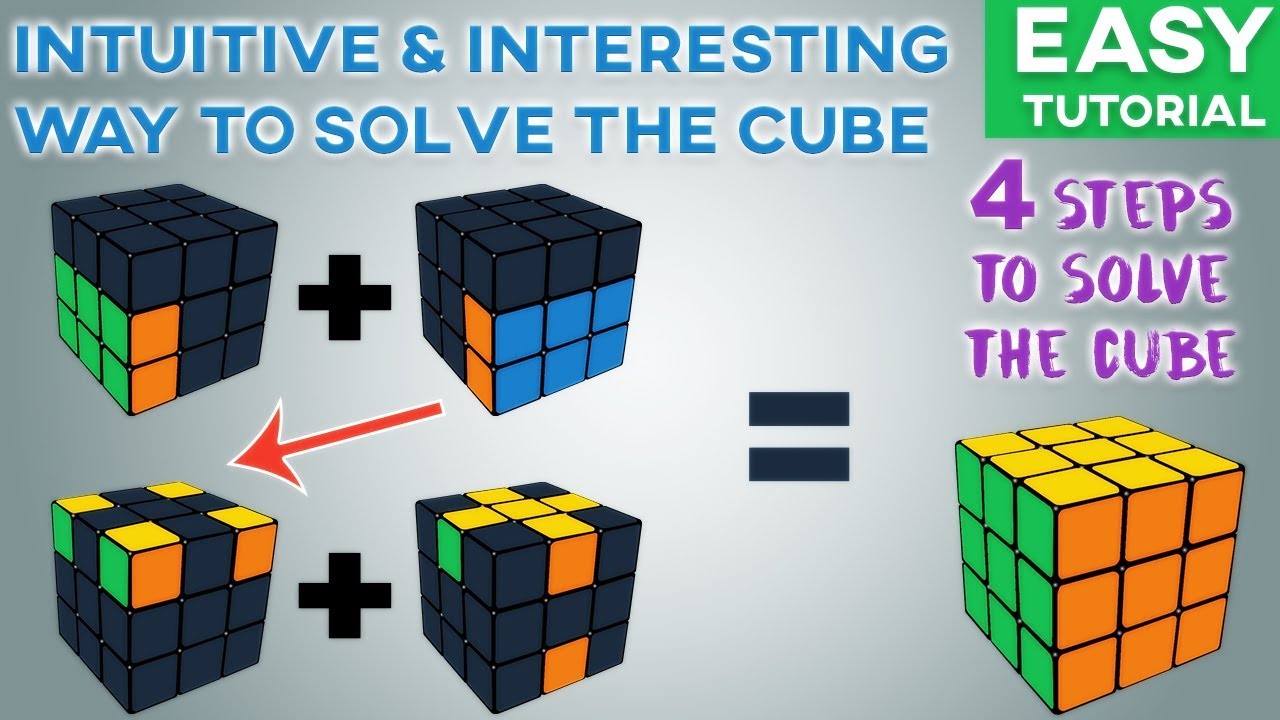
Solving a Rubik's Cube has evolved from a childhood curiosity into a sophisticated sport that captivates millions globally. In 2026, the landscape of speedcubing continues to shift, with more enthusiasts seeking methods that balance intuitive block-building with competitive efficiency. Among the "Big Four" solving methods—CFOP, Petrus, ZZ, and Roux—the Roux Method stands out as the most ergonomic and fluid approach for beginners transitioning into serious solvers. Unlike traditional layer-by-layer techniques that rely heavily on cube rotations, Roux minimizes these movements, focusing instead on creating two large blocks before finishing the puzzle.
If you are looking for "how to solve rubiks cube using roux method for beginners," you have found the definitive guide. This article breaks down the complex mechanics of Gilles Roux's invention into manageable steps, tailored specifically for the modern solver in 2026. Whether you are sitting in a cozy café in Austin, a bustling library in Seattle, or a local community center in Chicago, mastering this method will unlock a new level of satisfaction and speed. We will explore the history, the specific algorithms, and the strategic mindset required to go from a scrambled mess to a solved masterpiece in under a minute.
Why Choose the Roux Method Over Traditional Techniques?
Before diving into the step-by-step instructions, it is crucial to understand why the Roux method has become a favorite among solvers worldwide, even those just starting their journey. The primary advantage lies in its move efficiency. While the popular Fridrich (CFOP) method averages around 60 moves per solve, the Roux method typically requires only 48 moves. That seemingly small difference of 12 moves translates to significant time savings over hundreds of attempts, making it ideal for achieving faster times as you progress.
Another game-changer for the modern cuber is the reduction of cube rotations. In CFOP, you frequently rotate the entire cube to view different faces, which can break your flow and increase solving time. Roux solves almost entirely using R, r, M, and U moves, eliminating the need to hold the cube differently. This makes the method exceptionally ergonomic and is widely considered the best technique for one-handed solving, a skill highly valued in various sub-competitions.
Furthermore, the LSE (Last Six Edges) step offers unparalleled lookahead. Because the left and right layers are already complete after the first two blocks, your eyes can scan the top layer while your hands execute the final edge maneuvers seamlessly. For beginners in 2026 who want to avoid the massive memorization load of 78+ algorithms found in CFOP, Roux offers a smarter path. You only need to master 42 CMLL algorithms (or use a simplified 2-look version), allowing you to focus on intuition and pattern recognition rather than rote memorization.
Understanding the Anatomy of the Cube and Notation
To successfully learn how to solve rubiks cube using roux method for beginners, you must first speak the language of the cube. Without understanding standard notation, even the clearest tutorial will be confusing. Every 3×3 cube consists of three distinct types of pieces, each playing a vital role in the solution process.
The Three Types of Cube Pieces
- Corner Pieces: There are 8 corner pieces on every cube. Each corner has three colored stickers. These are the most complex pieces to manipulate because they affect three different faces simultaneously. In the Roux method, we prioritize solving these early in the process.
- Edge Pieces: There are 12 edge pieces, each featuring exactly two colors. These pieces sit between the corners and are crucial for forming the blocks. Getting the orientation and position of these edges correctly is the heart of the Roux method.
- Center Pieces: There are 6 center pieces, one for each face. Unlike corners and edges, centers never move relative to each other. Their fixed orientation defines the color of that face. A fundamental rule to remember is that white is always opposite yellow, blue is opposite green, and red is opposite orange. No matter how much you scramble the cube, these relationships remain constant.
Decoding Cube Notation
Standard notation uses letters to represent 90-degree clockwise turns of specific layers. For the Roux method, you will primarily use the following:
- R: Right face clockwise.
- L: Left face clockwise.
- U: Up face clockwise.
- D: Down face clockwise.
- F: Front face clockwise.
- B: Back face clockwise.
- M: Middle slice (between L and R) moved like the Left face.
- r: Wide right turn (R plus the middle slice).
- ' (Prime): Indicates a counter-clockwise turn (e.g., R' is Right counter-clockwise).
- 2: Indicates a 180-degree turn (e.g., U2 is Up twice).
Step 1: Building the First Block (FB) – Your Foundation
The Roux method begins where many other methods end: with a solid foundation. Your goal in this first step is to construct a 1x2x3 block on one side of the cube. Typically, beginners start by building this block on the Down-Left-Front (DLF) or simply the left side, using the blue center as an anchor. This block consists of three edges and three corners, forming a rectangular prism that serves as the anchor for the rest of the solve.
The Strategy for Block Building
There are two main ways to build this block: the "insertion" method and "block building." As a beginner, the insertion method is often more intuitive. However, aiming for 7 to 8 moves is the benchmark for efficiency. If you find yourself taking 15 moves, you are likely overthinking; try to visualize the pairings as you go.
- Anchor the Edge: Start by finding an edge piece that belongs to your chosen face (e.g., Blue/White). Place it in the DL (Down-Left) position with the correct color facing down.
- Find the Pair: Locate the corner piece that matches this edge (e.g., Blue/White/Red). Move this corner to the top layer without disturbing the DL edge.
- Insert the Corner: Use simple algorithms like R' U R or L' U' L to insert the corner next to the edge, forming a 1x2x2 square.
- Complete the Block: Add the remaining edge and corner to complete the 1x2x3 structure. Ensure the colors align perfectly with the centers.
This step might feel slow at first, but practice is key. Try to solve this block mentally during the 15-second inspection period allowed in competitions. By the time you pick up the cube, you should already know the sequence of moves to create the block instantly. Remember, the goal is not just to solve it, but to do so with minimal moves and maximum flow.
Step 2: Constructing the Second Block (SB) – The Mirror Image
Once the first block is secure on the left, the challenge shifts to building its mirror image on the opposite side: the Second Block (SB). This block is constructed on the Down-Right-Front (DRF) or right side. The critical constraint here is that you cannot break the first block. This requires careful planning and the use of specific slices.
Navigating the Constraints
Unlike the first block, where you had freedom to use any layer, the second block must be built without touching the Left (L) or Down (D) faces excessively, as this would disrupt your hard work. Instead, you will rely heavily on the Right (R), wide right (r), Middle (M), and Up (U) moves.
- Buffer Spot Strategy: Identify a buffer spot, usually the DR (Down-Right) edge position. Find the edge piece that belongs there (e.g., Green/White).
- Pair Creation: Similar to the first block, find the matching corner (Green/White/Orange) and pair them together in the top layer before inserting them.
- Execution: Insert the pair into the DR slot. Because the M-slice is still unsolved, you can use M moves freely here to orient pieces without affecting the completed left block.
- Completion: Repeat the process for the remaining edges and corners of the right side. You should now have two 1x2x3 blocks occupying the bottom left and bottom right of the cube.
At the end of this stage, the bottom two layers are effectively solved, leaving only the Up (U) slice and the Middle (M) slice free to move. This state is known as the "two-block state," and it sets the stage for the final, most exciting phase of the solve. Visualizing this transition is essential; imagine the cube as having two finished walls and an open roof waiting to be capped.
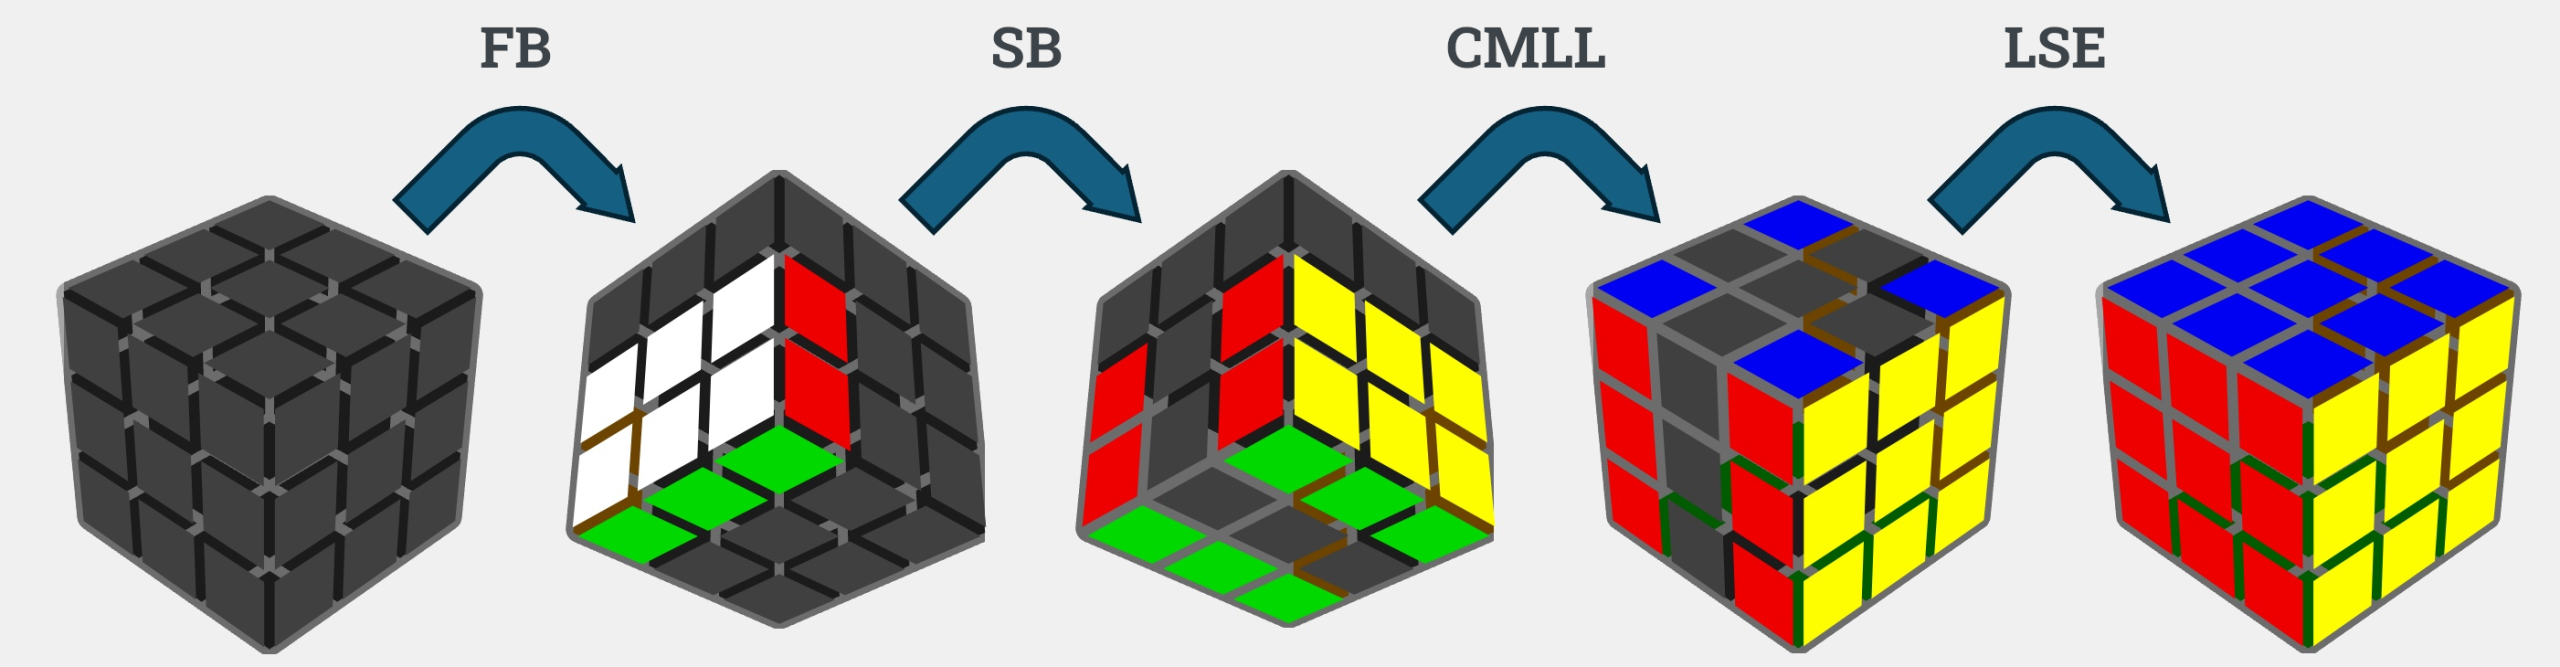
Step 3: Solving the Corners (CMLL) – The Big Leap
With the two blocks complete, you now face the CMLL (Corners of the Last Layer) step. This is often the most daunting part for beginners because it involves learning algorithms. However, in Roux, CMLL is slightly more forgiving than in other methods because you do not need to worry about the M-slice edges being solved yet.
Orientation vs. Permutation
CMLL handles both the orientation (facing up) and permutation (positioning) of the last four corners simultaneously. There are 42 possible cases in full CMLL, but you don't need to learn them all immediately. Many beginners opt for a 2-Look CMLL approach initially, which splits the step into two simpler stages:
- Orient All Corners: Make sure all yellow stickers (assuming yellow is up) are facing upward.
- Permute All Corners: Move the corners to their correct locations relative to the side colors.
Essential Algorithms for Beginners
While memorizing all 42 algorithms is the goal for advanced solvers like Kian Mansour, you can start with the most common patterns. The Sune and Anti-Sune are your best friends here.
- Sune Algorithm:
R U R' U R U2 R'– This twists three corners clockwise. - Anti-Sune:
L' U' L U' L' U'2 L U'2– This twists three corners counter-clockwise. - Jb Perm: Used for positioning specific corner configurations.
- Y Perm: Another useful algorithm for cycling corners.
Focus on recognizing the patterns visually. When you look at the top layer, ask yourself: "Do I have a line? A dot? An 'L' shape?" Once you identify the pattern, apply the corresponding algorithm. With practice, your brain will recognize these shapes instantly, allowing for rapid execution. Remember, since the bottom corners are already solved, you have fewer cases to worry about compared to Ortega method variants, making this step more manageable.
Step 4: Last Six Edges (LSE) – The Fluid Finish
The final stage of the Roux method is the Last Six Edges (LSE). This is where the true magic of the method shines. Because the left and right sides are already complete, you only need to solve the six edges remaining in the U and M slices. This step is renowned for its smoothness and ability to be executed with high Turns Per Second (TPS).
The Three Sub-Stages of LSE
Experts often break LSE down into three logical sub-steps to make it less overwhelming:
- Orientation: First, ensure all six edges are oriented correctly (the sticker facing the correct direction). You can do this using only M and U moves. Since you aren't touching the side layers, you preserve your blocks while fixing the orientation.
- Permute UL and UR: Next, solve the Upper Left and Upper Right edges. At this point, the Left and Right layers should be completely solved, leaving only the M-slice and U-slice edges scrambled.
- Permute the Rest: Finally, solve the remaining edges in the M-slice. This often feels like a quick cleanup once the previous steps are done.
Why LSE is a Game Changer
The LSE step allows for incredible lookahead. While your hands are executing a fast sequence of M and U moves, your eyes can already be scanning the cube for the next setup move. This creates a continuous flow that is very satisfying to watch and execute. For solvers in 2026 who value fluidity and style, mastering LSE is the key to dropping below the 30-second mark consistently. It requires patience to learn initially, but the reward is a solving experience that feels less like a calculation and more like a dance.
Tips for Success and Common Pitfalls
Even with a clear roadmap, beginners often encounter specific hurdles when learning the Roux method. Addressing these early can prevent frustration and accelerate your progress.
Embrace Color Neutrality
One of the biggest mental barriers for beginners is sticking to one color scheme (e.g., White on bottom). In Roux, you should practice color neutrality. This means being comfortable solving with either White or Yellow on the bottom. This flexibility allows you to choose the orientation that gives you the easiest block build, significantly improving your inspection time and overall speed.
Avoid Over-Complicating the First Block
It is tempting to try to solve the first block perfectly in one go using complex sequences. Resist this urge. Focus on intuition. If a move breaks something, undo it quickly. The goal of the first few weeks is to get comfortable pairing pieces, not to achieve perfection. Speed will come naturally as your muscle memory develops.
Practice Lookahead
Lookahead is the ability to see the next move while executing the current one. In Roux, this is critical during the transition from CMLL to LSE. Start by solving slowly and consciously thinking ahead. Gradually increase your speed only when your lookahead becomes automatic. This skill separates casual solvers from dedicated competitors.
Advanced Techniques for the Modern Roux Solver
As you transition from a beginner to an intermediate solver, the focus must shift from simply completing steps to optimizing every single move. The beauty of the Roux method lies in its adaptability; it scales effortlessly from a casual 30-second solve to a sub-10-second world-class performance. To reach this elite level, you must master fingertip tricks and efficient setup moves. Unlike CFOP, which relies heavily on rotating the entire cube to align faces, Roux solvers utilize wide turns (r, l) and slice moves (M, E, S) to reorient pieces without moving their hands. This minimizes travel time and keeps your wrists in a natural, relaxed position, reducing fatigue during long solving sessions or competitions.
One advanced concept to adopt early is block skipping. In competitive speedcubing, if your inspection reveals that the first block can be built almost identically to the second block due to symmetry, you might choose to skip building one entirely and instead solve it later during the LSE phase if it saves overall time. While this is risky for beginners, understanding the theory helps you appreciate why top-tier solvers like Max Park or Felix Zemdegs can achieve such fluidity. They treat the cube not as a series of rigid steps, but as a dynamic system where every piece has multiple potential homes until the very end.
Another critical area for improvement is algorithm recognition. When learning CMLL and LSE, avoid memorizing algorithms by writing them down repeatedly. Instead, use visual anchors. For example, when performing the Sune algorithm, imagine the pattern looks like a sun rising. When doing the Jb perm, visualize a letter "J" being drawn in the air. This cognitive association speeds up recall significantly. Furthermore, practice executing these algorithms at varying speeds. Some algorithms look fast when done slowly but become messy at high TPS (Turns Per Second). Mastering the "micro-movements"—the subtle wrist flicks that initiate a turn rather than pushing with the whole hand—is essential for maintaining consistency above 6 TPS.
Troubleshooting Common Challenges
Despite its elegance, the Roux method presents unique challenges that can trip up even the most dedicated learners. Understanding these pitfalls and how to overcome them is vital for steady progress.
The "Block Breakage" Anxiety
One of the most common fears for beginners is accidentally breaking the first block while trying to build the second. This often happens when solvers try to force a pair into place using inefficient moves. The solution lies in buffer management. Always identify your buffer piece before you start a sequence. If you are inserting a corner-edge pair into the Down-Right slot, ensure you know exactly where that pair comes from in the top layer beforehand. If the path is blocked, do not panic; perform a quick setup move (a simple U or r' turn) to clear the path, execute the insertion, and then undo the setup. This maintains the integrity of your blocks while allowing flexibility.
Stuck in the Middle Layer
Sometimes, solvers find themselves unable to orient the last six edges without disrupting the already solved side layers. This usually indicates a lack of familiarity with slice moves. In Roux, the M slice is your best friend. If you feel restricted because you cannot turn the Right face without messing up the left block, remember that turning the middle slice (M) affects only the top and bottom layers relative to the front/back, leaving the Left and Right outer layers intact. Practice drills that involve exclusively using M and U moves to scramble and solve just the top layer edges. This builds the specific muscle memory needed for the LSE phase.
Slow Inspection Times
A slow inspection period can ruin a fast solve. Many beginners spend too much time trying to visualize the entire solution path from scratch. Improve this by adopting a pattern-based inspection strategy. Instead of planning every single move, look for obvious pairs already formed in the scramble. Ask yourself: "Where are the corners for the first block?" and "Can I see a potential second block configuration?" By focusing on high-level patterns rather than low-level details, you reduce cognitive load and make faster decisions once you pick up the cube.
The Competitive Landscape in 2026
The year 2026 marks a significant evolution in the speedcubing community, with the Roux method solidifying its position as the dominant technique for average solvers aiming for competitive times. WCA (World Cube Association) records continue to be shattered, with the current world record hovering just under 3.13 seconds, a feat achieved through near-perfect execution of the Roux method. What was once considered a niche alternative to CFOP has now become the standard curriculum in most cubing clubs and online tutorial channels.
This shift is driven by the increasing availability of high-quality educational content. Platforms like YouTube and specialized forums now host thousands of hours of breakdowns specifically tailored to the Roux method, covering everything from basic block building to advanced lookahead techniques. Additionally, the rise of AI-assisted training tools allows beginners to analyze their solves in real-time, identifying inefficiencies in their move sequences that they might have missed otherwise. These tools provide instant feedback on move counts and TPS, helping solvers refine their technique faster than ever before.
Moreover, the community aspect of Roux has grown exponentially. Local meetups and online Discord servers dedicated to "Roux Beginners" foster an environment where new solvers can share tips, watch live solves, and receive mentorship from experienced competitors. This supportive network accelerates the learning curve, making the journey from scrambled chaos to solved perfection more accessible and enjoyable. As we look toward the future of cubing, the principles of efficiency, ergonomics, and intuition that define the Roux method will likely influence other puzzle-solving disciplines as well.
Frequently Asked Questions (FAQ)
To further assist you on your journey, here are answers to some of the most frequently asked questions regarding the Roux method.
Q: Do I need to learn all 42 CMLL algorithms to succeed with Roux?
A: Not immediately. While mastering all 42 cases is the goal for elite speedcubers, you can effectively solve the cube using a "2-Look CMLL" approach. This involves two simpler steps: first orienting all yellow stickers upward, and then permuting the corners into their correct positions. You only need to learn about 6-8 core algorithms for this simplified version. Gradually add more algorithms as your comfort level increases.
Q: Is the Roux method harder to learn than CFOP?
A: Generally, no. Most beginners find the initial stages of Roux (building the two blocks) more intuitive than CFOP's cross and F2L (First Two Layers). However, Roux requires a steeper climb in the final stages, specifically with CMLL and LSE, due to the need for specific algorithms and slice moves. If you prefer block-building over layer-by-layer construction, Roux will likely feel more natural to you.
Q: Can I use Roux for one-handed solving?
A: Absolutely. In fact, Roux is widely considered the superior method for one-handed solving. Because it minimizes cube rotations and relies heavily on R, L, U, D, M, and r/l moves, it is easier to execute with a single hand. Many one-handed specialists exclusively use Roux because the ergonomic flow translates seamlessly to单手 (one-hand) operations.
Q: How long does it typically take to learn Roux?
A: With consistent practice (about 30 minutes a day), most beginners can solve the cube using Roux within 2 to 4 weeks. Reaching a comfortable sub-45-second time usually takes about 2-3 months. Achieving sub-30-second times may take several months of dedicated practice focusing on lookahead and algorithm fluency.
Conclusion: Your Journey Begins Now
Mastering the Rubik's Cube via the Roux method is more than just learning a set of algorithms; it is about adopting a mindset of efficiency, creativity, and fluidity. As we stand in 2026, the tools and knowledge available to you are greater than ever before. Whether you are solving for fun in your living room or competing on the global stage, the Roux method offers a pathway that respects both your intelligence and your dexterity.
Remember that every great solver started exactly where you are now: holding a scrambled cube, wondering where to begin. The difference between those who quit and those who master the puzzle is persistence and the willingness to embrace the learning process. Start with the First Block, trust your intuition, and gradually build upon each step. Soon, what once seemed impossible will become second nature. The cube is no longer a mystery; it is a canvas waiting for your touch. So, grab your cube, apply the techniques outlined in this guide, and experience the sheer joy of bringing order out of chaos. The world of speedcubing is waiting for you to make your mark.